

Dean Waters at the Pacific Audio Fest, 2023: a portrait with cigar (photograph and image processing by David W. Robinson)
The Tambaqui from Mola Mola represents the finest in high end DACs available for the serious audiophile who's looking for a no-compromise solution for digital-to-analog bliss. I've been listening to the Tambaqui for the last several months, and I can say without reservation that this presents the clearest, cleanest, and most open sound that I've experienced from my digital library to date. In this article, we'll go over some of the details and characteristics that make this such a stand-out "must-have" (or at least a "must consider") if you're serious about your listening and about enjoying your digital music library to the fullest.
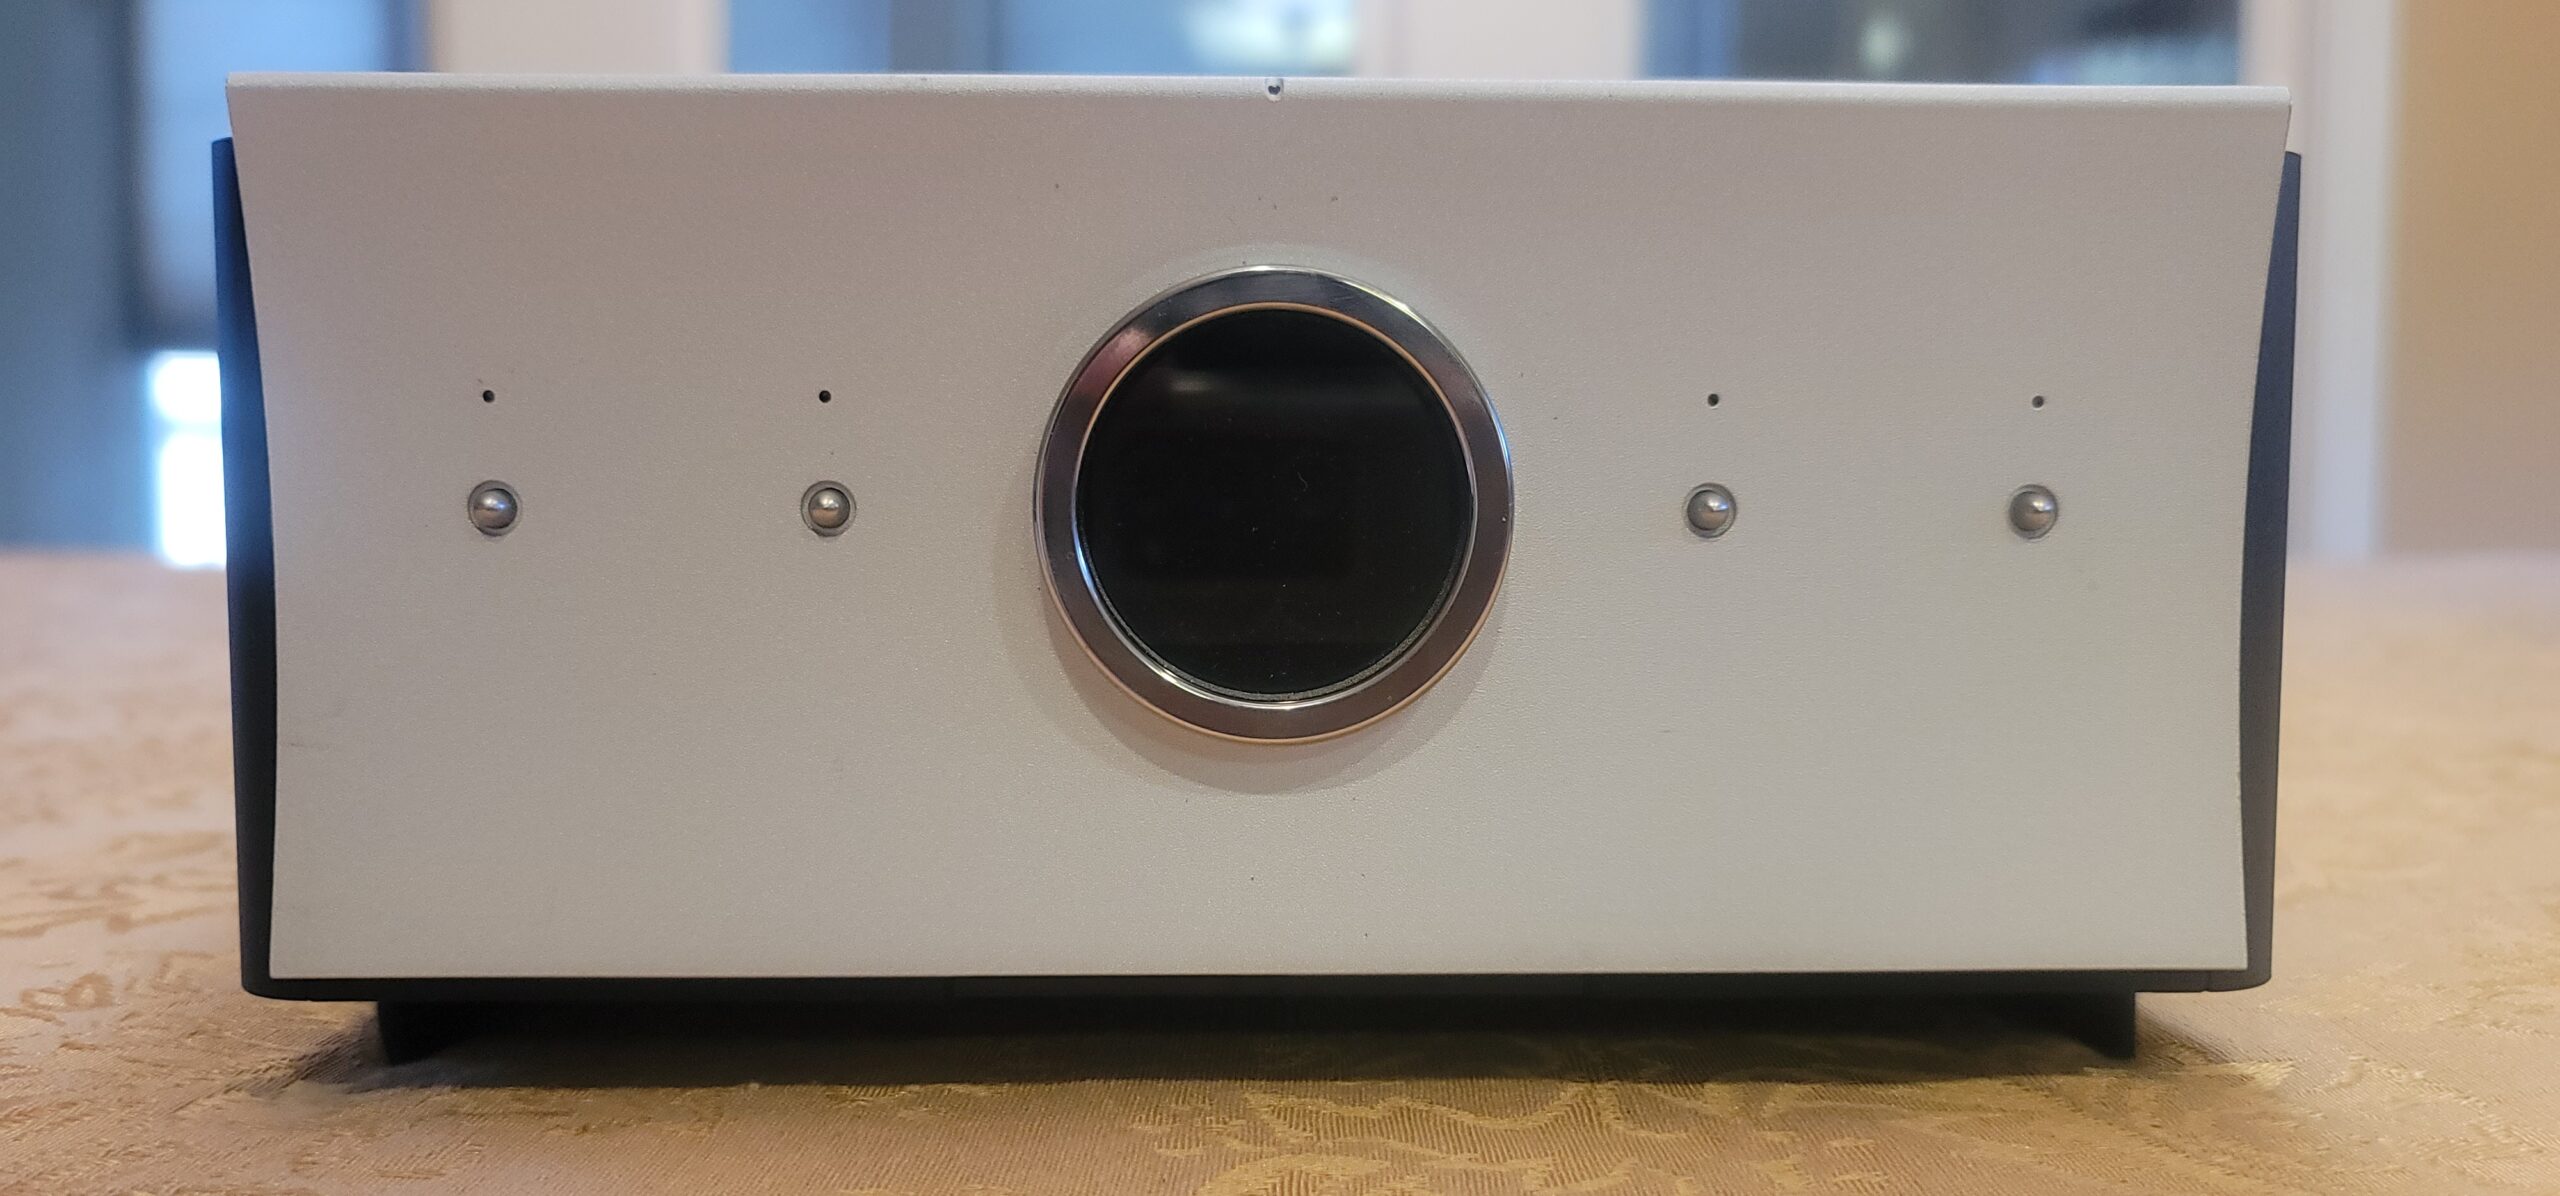
The Mola Mola Tambaqui DAC, front view
Let's start with the front.
There are four configurable preset buttons on the front of the Tambaqui. Each one can be configured to a specific input with parameters that you can customize. You can mix and match inputs and settings for each preset. You can have multiple presets tied to the same input using different parameters. This is particularly useful when dealing with polarity (more on this later).
Turning on the Tambaqui is as simple as pressing any of the preset buttons on the front of the device or on the included remote. There is no separate power button. I like this design choice. It's a single button to get going. Holding a preset button for a brief moment turns the unit off when you're done. There is a small white LED directly over each preset button indicating which preset is selected. There is also a small LED in the center over the main display that illuminates white when powered on, and a dim red when powered off in stand-by mode. The brightness of both the LEDs and the display are configurable so as not to light up the room when listening late at night.
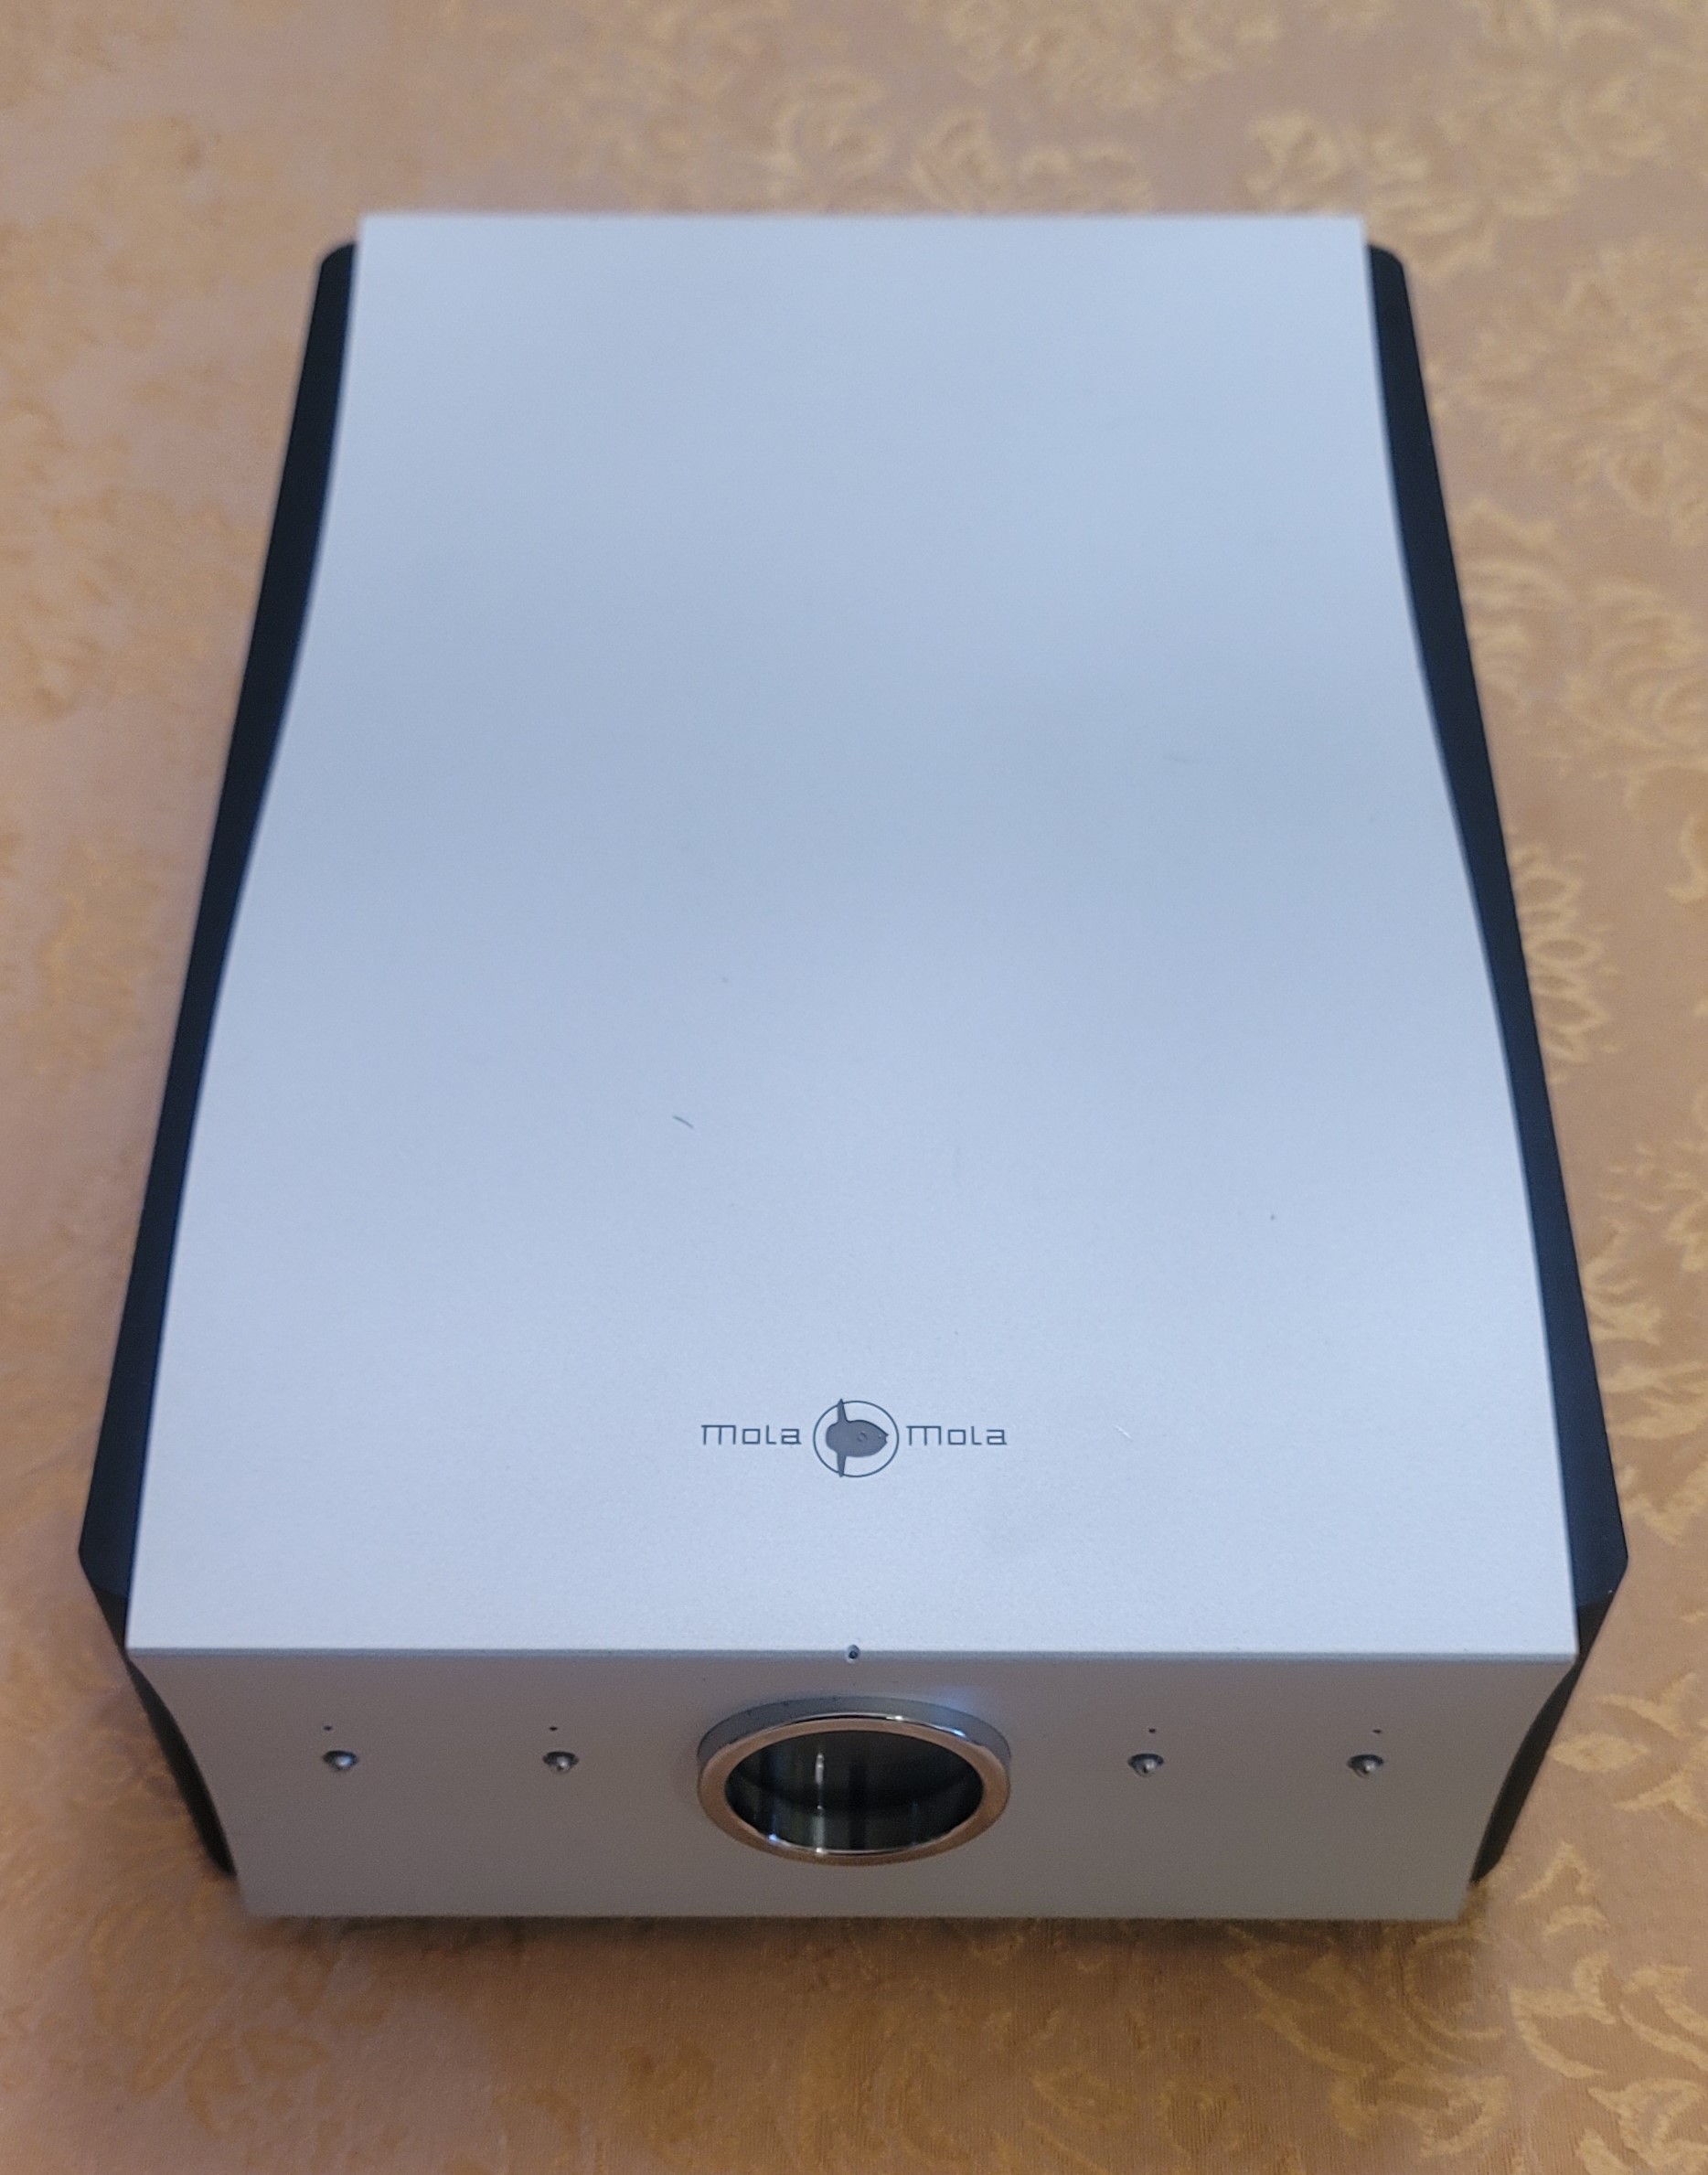
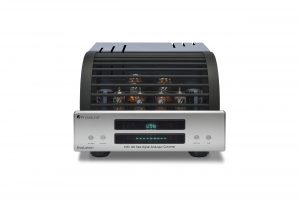
Top view. Note this same chassis design carries though the entire Mola Mola line of products.
In addition to this button function layout, where each button corresponds to a configured preset, you can configure the Tambaqui so that once powered on the buttons take on a different set of behaviors. In this Volume Control Mode setting, two of the front buttons are used to control the volume. One is used to cycle through the presets. And one is used to mute and power off the unit. Personally, I like the default setting where each button chooses a preset, and I use either the physical remote or the remote app to control the volume.
The 1.5" (38mm) round display in the center of the Tambaqui displays the input source selected (S/PDIF, Optical, Network, USB, AES, I2S, or Bluetooth). Above this is the selected volume level. The word "Direct" is substituted if you're running in direct mode and you're using your preamplifier or amplifier to control the volume. The volume level is indicated in full-scale, such as what you'd expect to see on a sound mixing board, where 0dB would be maximum loudness, and anything less than full volume is displayed as a negative number. Thus, the Tambaqui is basically showing the amount of decibels down from full scale (max volume). Thus, when muted, the display shows -∞ (minus infinity).
This might take a little getting used to if you've never worked in a sound studio before. The display clearly shows the indicated volume as a negative number in the display. It's easy to overlook the negative (minus) sign in front of the number and just see the digits like a regular number as a volume indicator. Just remember that as the digits increase on the display, the volume is going down, and vice versa. Since the buttons on the remote control don't have indicators on them, I've inadvertently turned the volume in the wrong direction a few times. I'm just so used to the numbers going UP as I crank the volume. I'm reminded of Spinal Tap's "These go to 11." In Mola Mola terms, 0dB is Spinal Tap's 11!
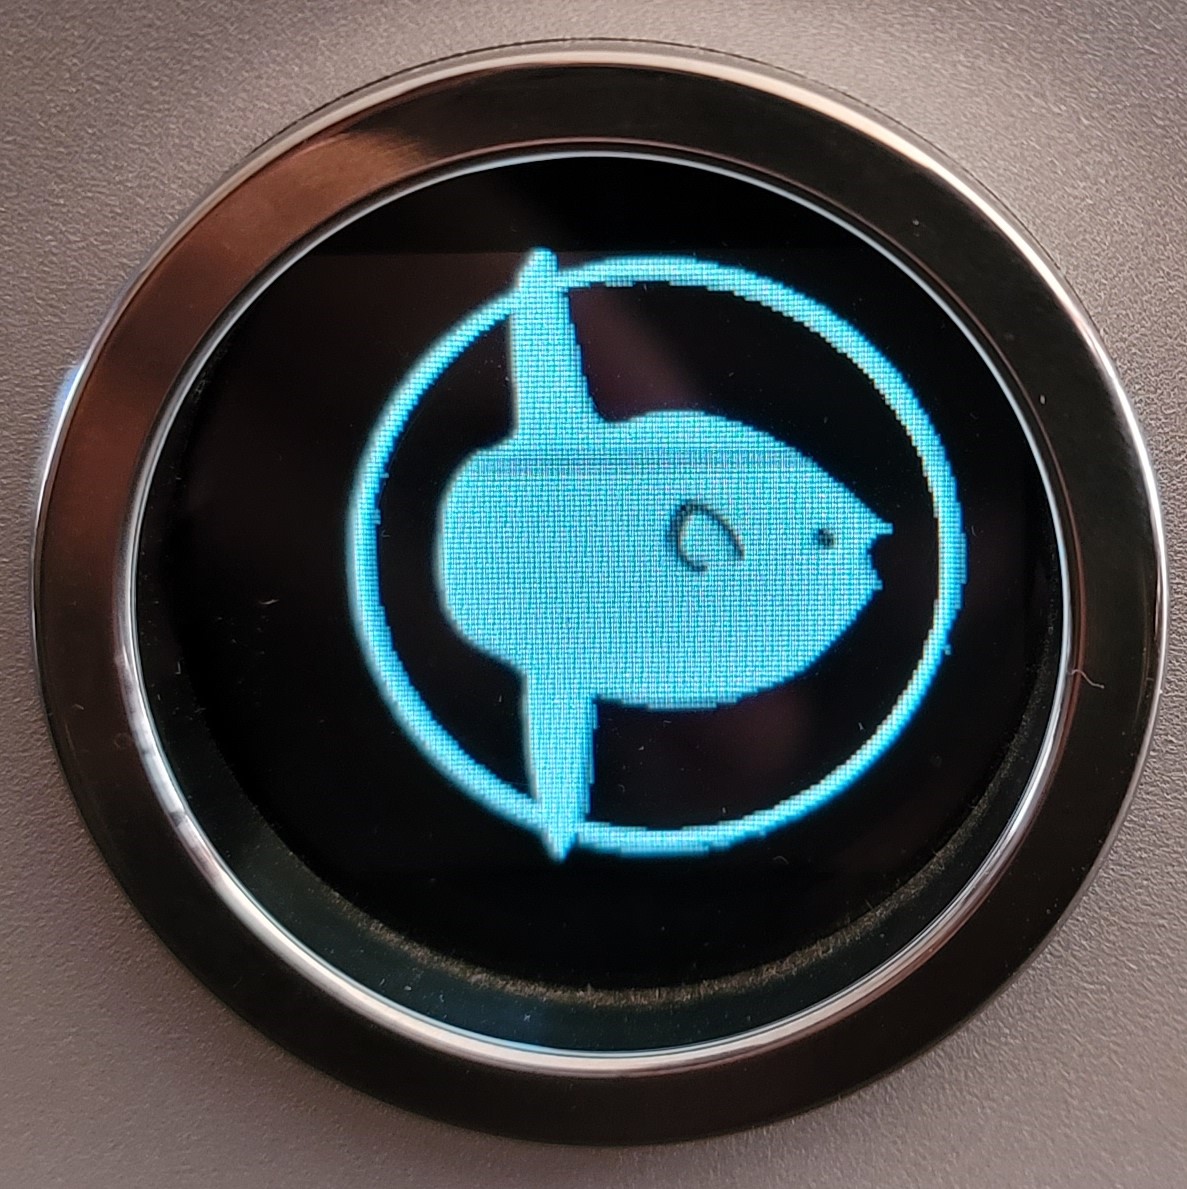
Power on-logo
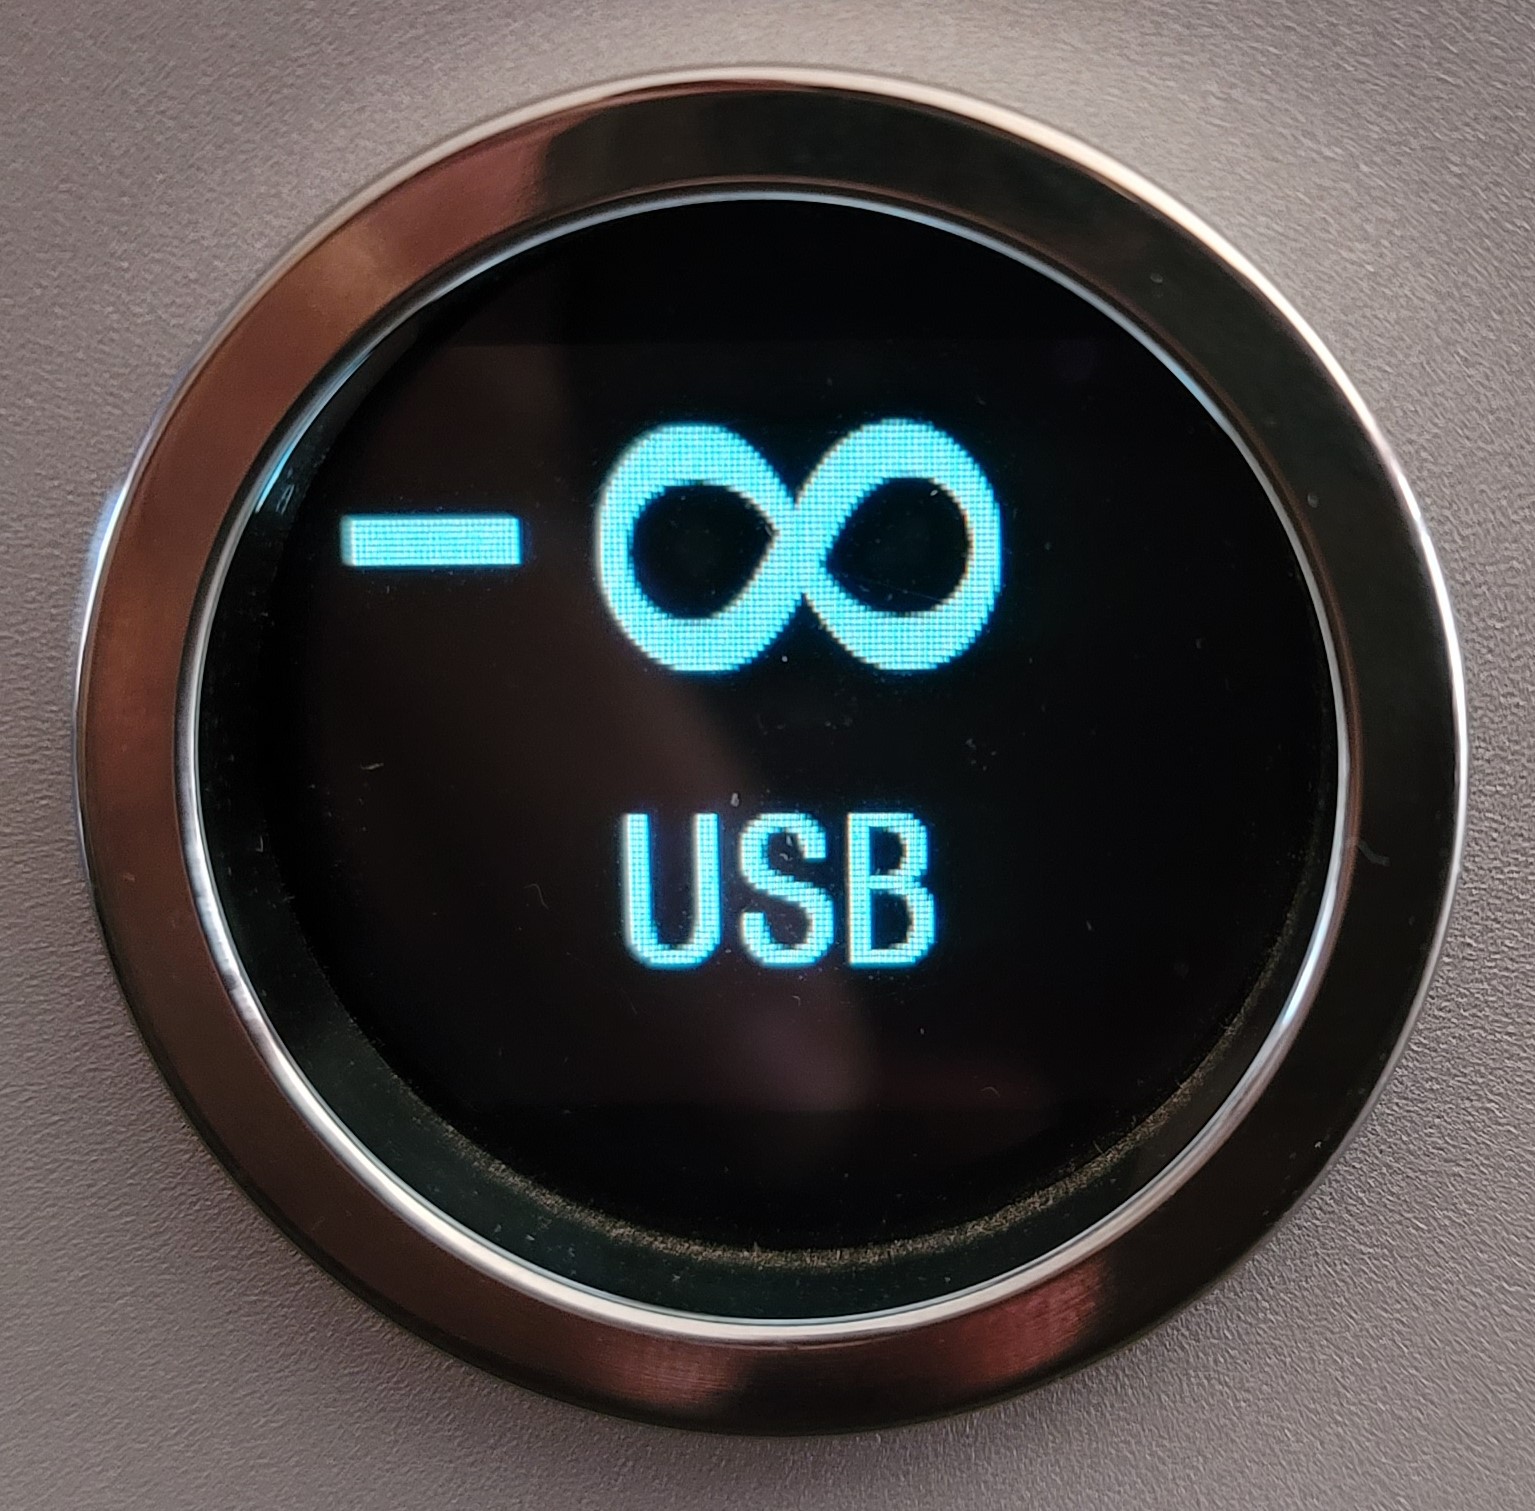
Muted

Normal listening

Crank it up!
One suggestion I would make to Mola Mola in regard to the front display is I would like to also see the resolution of the source being fed into the unit. This is displayed in the app at the bottom of the preset selection and volume screen. "DSD256", or "44.1kHz" for example. I would opt to see this information displayed right below the input source on the display screen of the Tambaqui.
Let's take some time here and look at the inputs and outputs that the Tambaqui has to offer and explore some of the more detailed features of each.
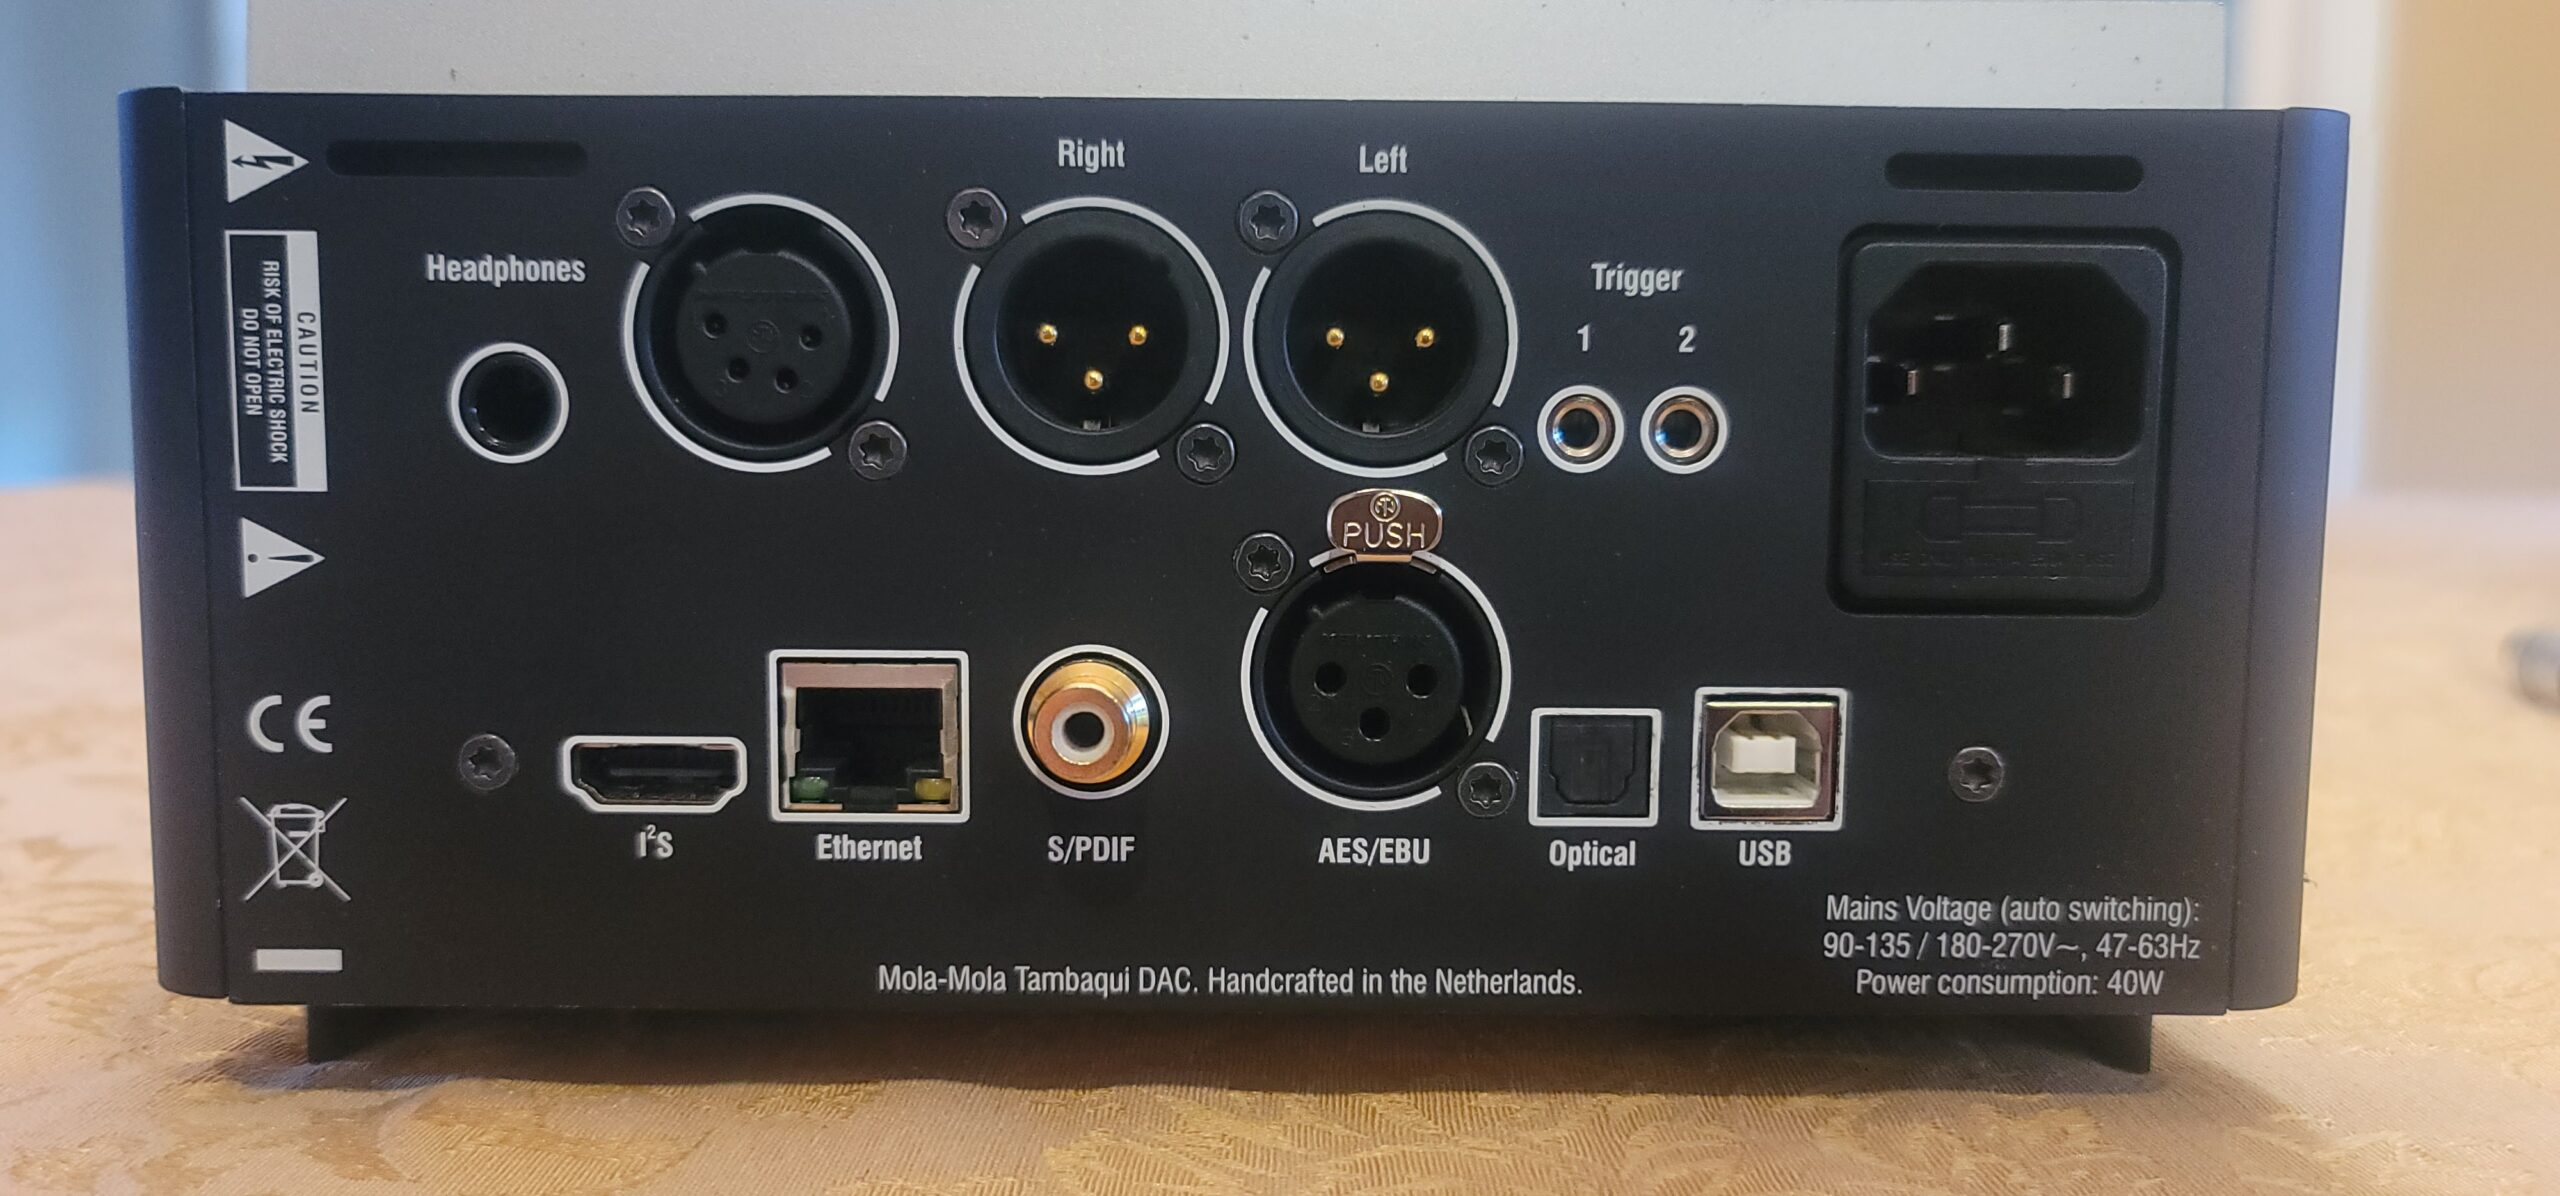
Back view
Outputs
Mains: The Tambaqui natively supports balanced XLR outputs. Also provided with the unit are a pair of XLR-to-RCA adapters. These adapters are specially designed and made for the Tambaqui and are engineered to provide the best possible conversion from a balanced signal to an unbalanced signal.
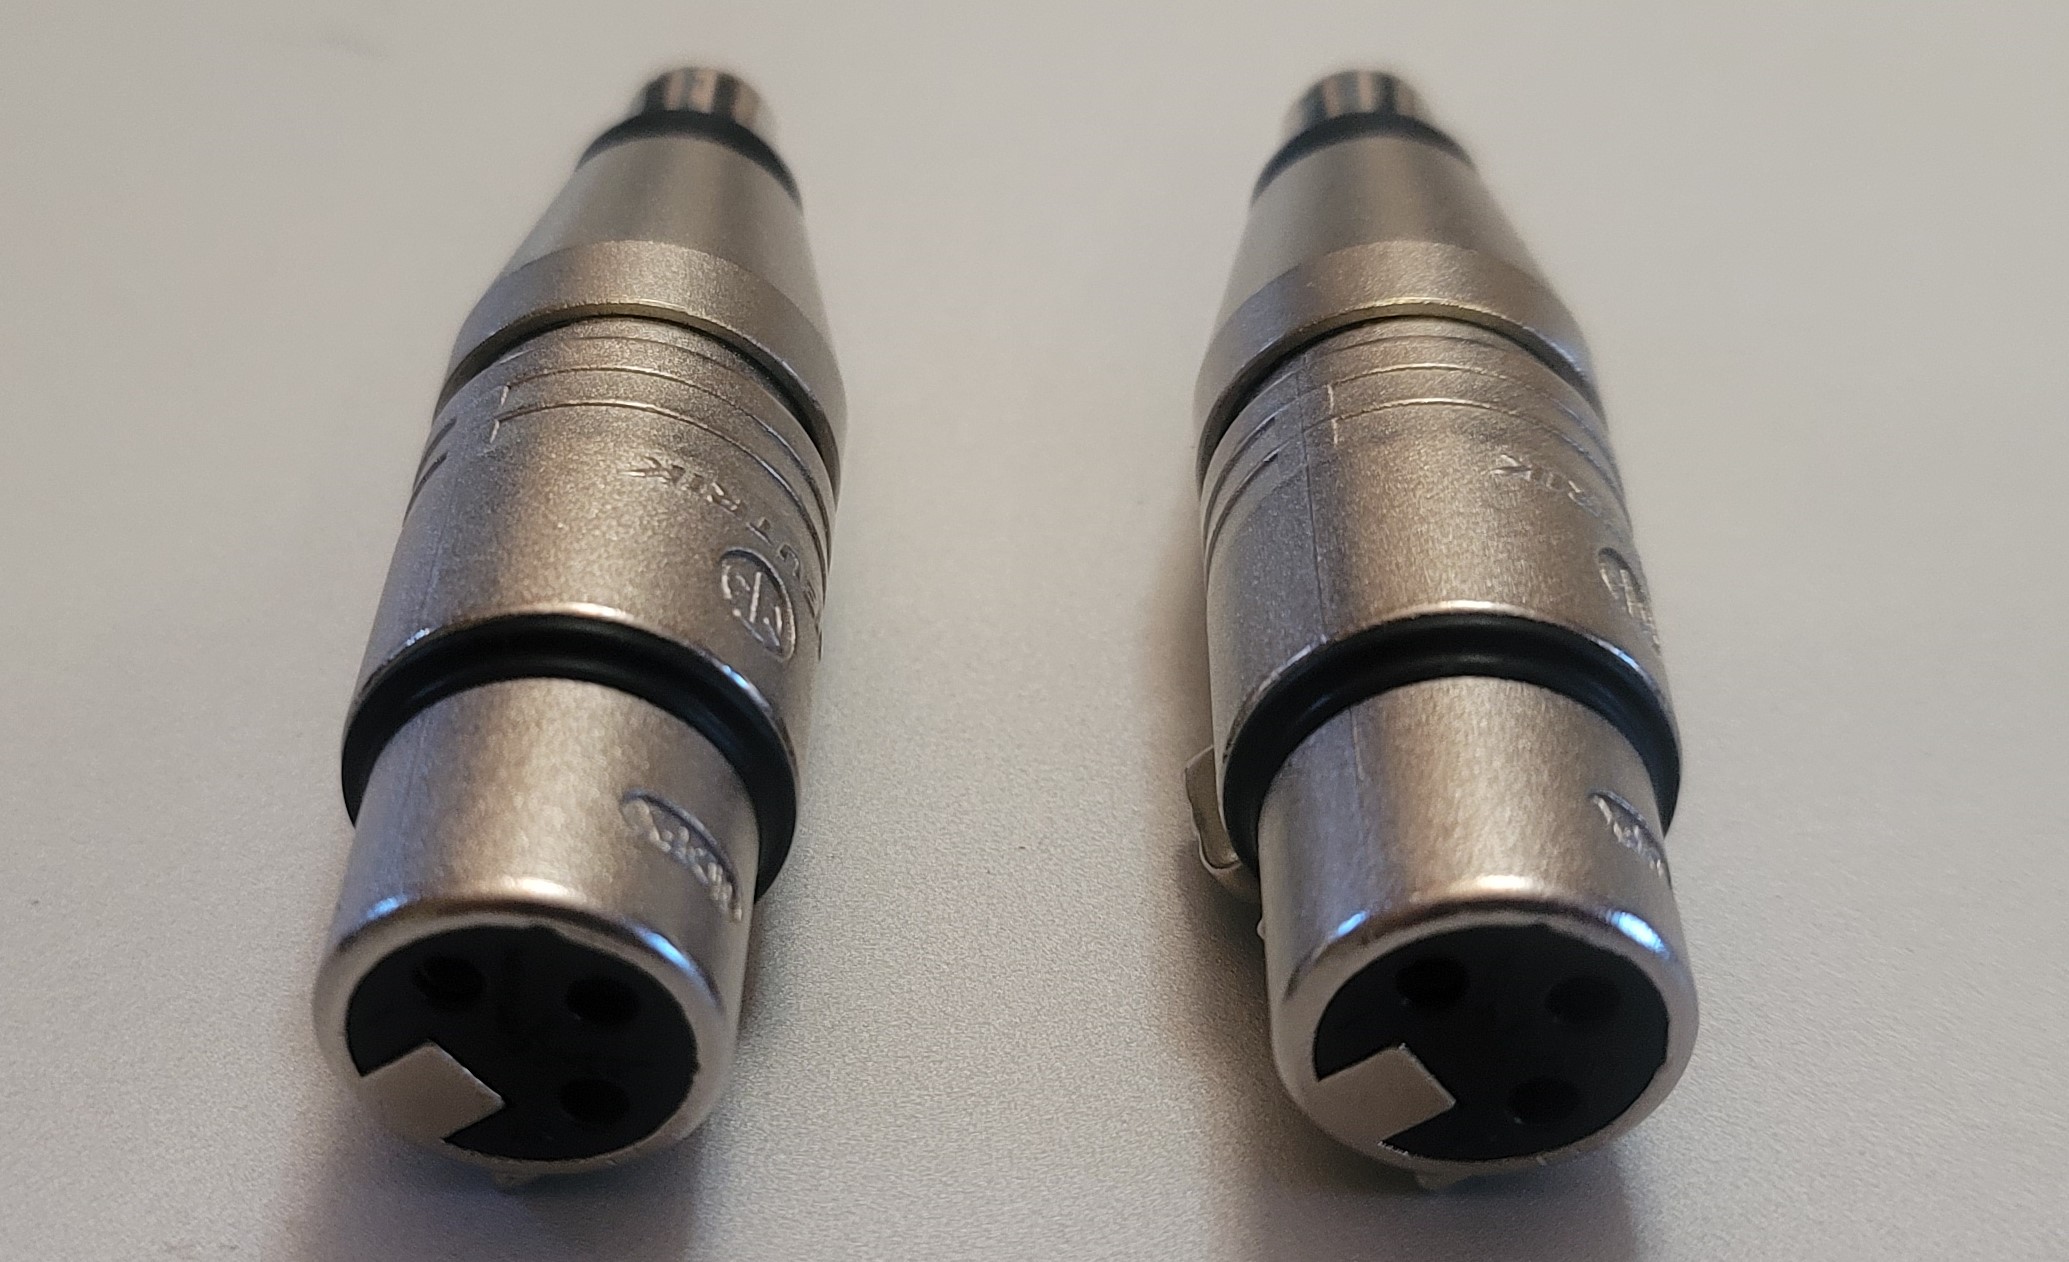
XLR (balanced) to RCA (unbalanced) connectors included with the Tambaqui
Headphones: A standard ¼" (6.3mm) headphone jack is located on the back, as well as a balanced XLR4 headphone jack. At the risk of breaking up the aesthetic of the unit, I would have been happy to see these connections, or at least the ¼" jack, available on the front of the unit. I don't always leave my headphones plugged in and being able to attach and detach my set of ear-cans without needing to reach behind the unit would be appreciated. In my setup, the DAC is located on top of the equipment cabinet, so access to the rear of the unit isn't a problem. If this unit were located inside of a cabinet, then I'd either have to leave the headphones always connected, or accept that I'd need to reach back and fiddle with the connector each time I want to listen with them. This could be somewhat cumbersome with the XLR4 connection as that connection needs to be oriented correctly, as opposed to a ¼" plug-in jack. Since the XLR4 jack is likely less used and considerably larger than the ¼", I can see why the designers would leave this connection on the rear of the unit for aesthetics. Still, my personal preference would have been for the ¼" jack to be on the front. Just a personal preference.
There are two trigger ports on the back to power on/off other connected devices. Having two separate triggers is very much appreciated, especially if you're using separate mono-block amps for each channel. The trigger ports can be individually controlled based on the input presets selected via the Mola Mola app on a phone or tablet. I measured 12.4 volts being supplied on each trigger port when selected as active.
Inputs
There are seven different inputs on the Tambaqui, making this one of the most versatile DACs available. Regardless of how you source your digital library, the Tambaqui is sure to have you covered.
Digital input from a CD transport or a streamer can utilize the S/PDIF connections. There is one for coax, and a Toslink connection for fiber hookup. Note that only PCM formats are supported. This is a limitation of the S/PDIF specifications and not a limitation of the Tambaqui. Bitstream (PWM) formats are not supported on these interfaces. Neither DSD nor SACD can be played natively on these connections. PCM Resolutions up to 24-bit/192kHz are supported.
The ABS/EBU (Audio Engineering Society/European Broadcasting Union) connection supports PCM formats just the same as the S/PDIF and Toslink connections. Think of ABS/EBU as a somewhat "professional" PCM connection. It's not as common as S/PDIF (and by extension Toslink). An advantage of ABS/EBU is the signal voltages are higher and the cables can be considerably longer. Using a 110 ohm shielded cable with XLR connections can yield a usable cable length of 100 meters. This type of connection is often used in the video recording industry for audio transport.
The Tambaqui is a Roon ready device, and integrates with Roon via the ethernet port on the back of the unit. PCM support up to 384kHz is supported as is both native and DoP DSD up to DSD256 (Quad-DSD).
I think there's an opportunity here for other network services to be made available in the future. For example, streaming directly from a NAS on a local network isn't supported, nor are other network streaming services like DLNA. There are other options available to get content stored on a local network to the Tambaqui, such as Bluetooth streaming (limited to 16-Bit/48Khz) through a tablet or phone that is connected to the same network as the NAS. Much better still would be to go via a USB connection from a PC or Mac that is directly connected to the Tambaqui.
The one input not visible on the back of the unit is Bluetooth. The DAC supports Bluetooth streaming (SBC, AAC, APTX, and LDAC). The Bluetooth connection is limited to 16-Bit/48kHz PCM resolution. This is the same resolution as a standard CD with a slightly better sample-rate.
I2S is an option for those with I2S-equipped sources, most notably offerings from PS Audio which support DSD via I2S. AudioQuest has some very fine ultra-high-resolution I2S cables that work exceptionally well.
The most versatile input on the Tambaqui (for me anyway) is the USB connection. The USB connection and the network Roon connection are the only connections that support bitstream. Up to Quad-DSD (DSD256 - 11.2896 MHz) is supported through these connections. Both native DSD256 and DoP (DSD over PCM) at DSD256 are supported. To stream my high-definition content, I use a Windows PC running Audirvāna Origin that is directly connected to the Tambaqui via USB. Content in formats higher than DSD256 are automatically down-converted by Audirvāna to PCM 24-bit/705.6kHz (2-channel). This particular setup allows me to experience my entire stored library at the best possible resolution for the Tambaqui DAC. I can stream content locally-stored on the PC, or the full library on my networked NAS. Also, Using the Audirvāna mobile app, I can select anything in the library for listening though the USB connection without touching the PC. Controlling the DAC and selecting content from the digital library are done from the tablet next to my listening position.
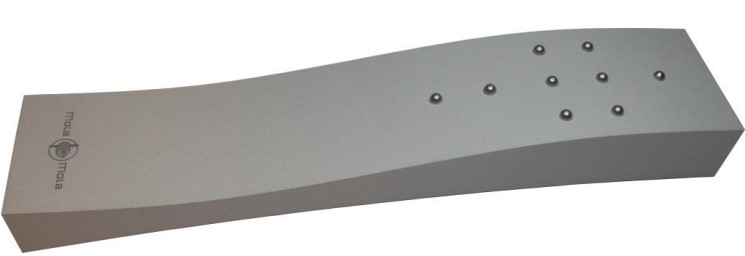
Physical Remote
There are two physical IR remote control options for the Tambaqui. The "standard" remote is the one I have. It is a beautifully crafted brushed metal constructed device that is fairly hefty and is super easy to navigate. There are five non-labeled buttons on the remote, stacked one on top of the other from top to bottom in a single column. Preset selection, volume control, and power on/off functions are all available with a single press of one of the buttons. There is also a Premium IR remote available that has additional buttons and a more elegant overall shape and design than the standard remote. For me, the standard remote is fine, although the Premium remote is certainly a better looking option!
Mola Mola Premium Remote (image courtesy of Mola Mola)
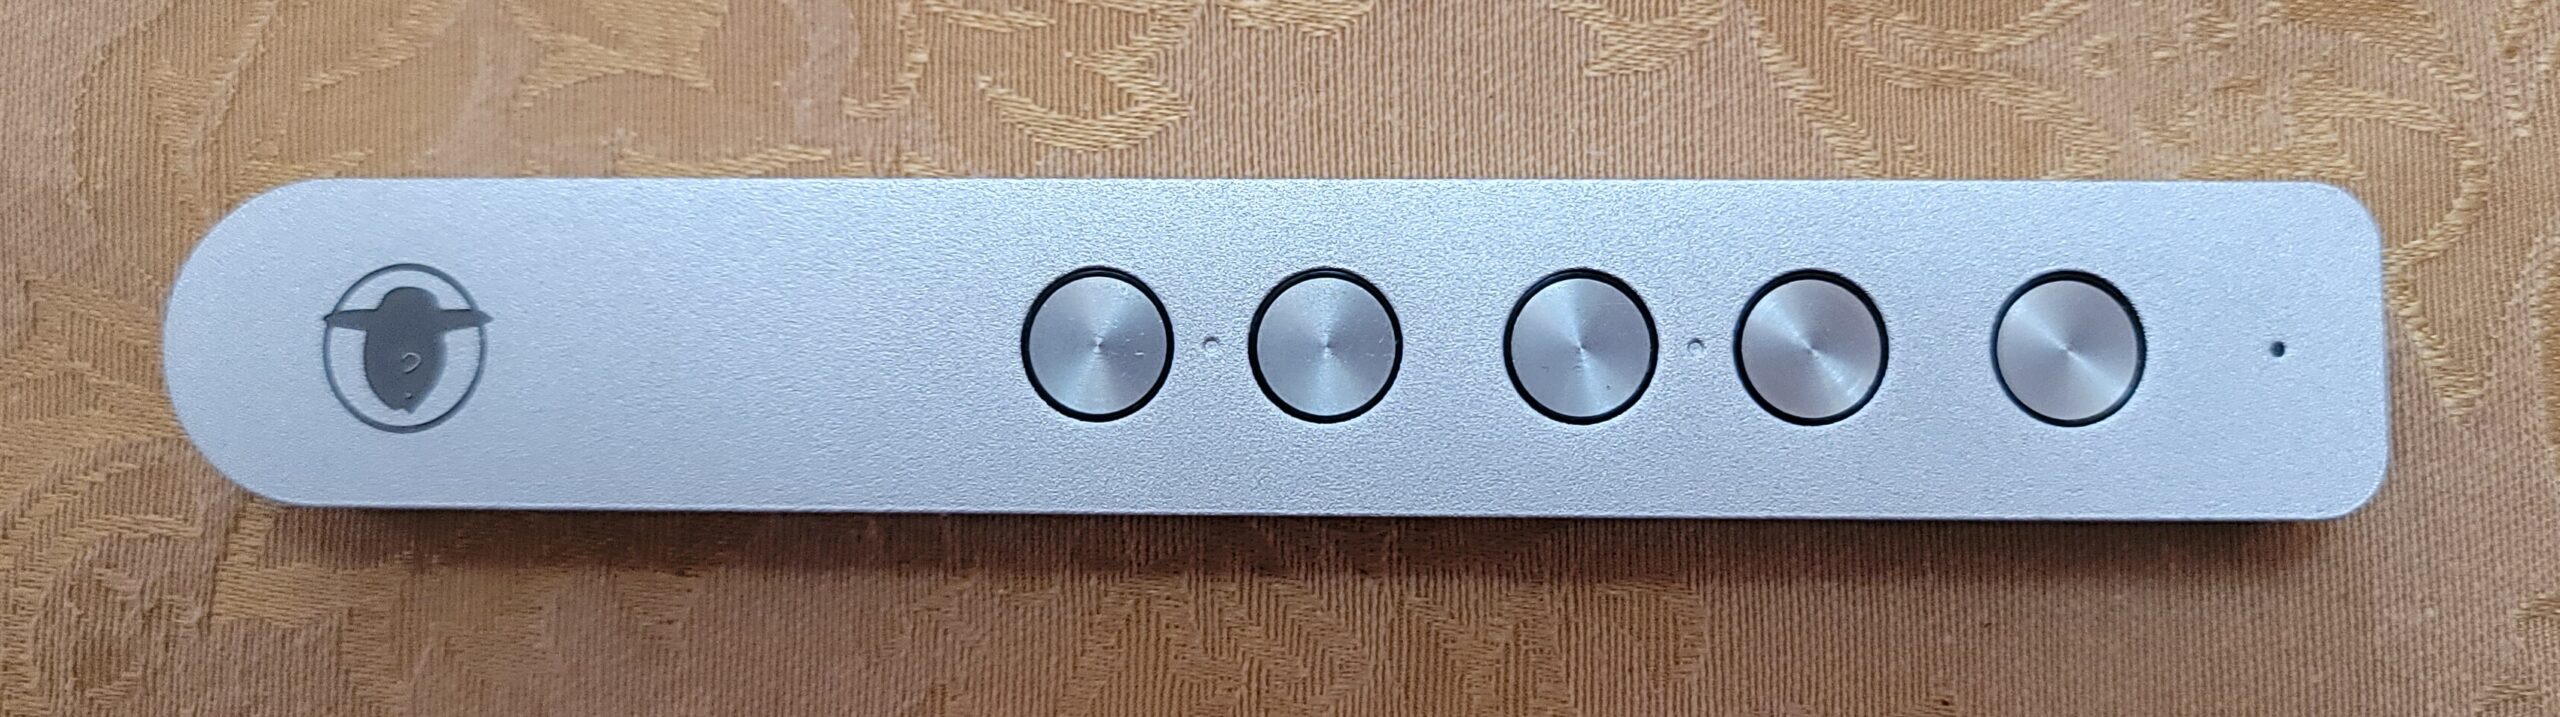
The standard Tambaqui 5-button remote
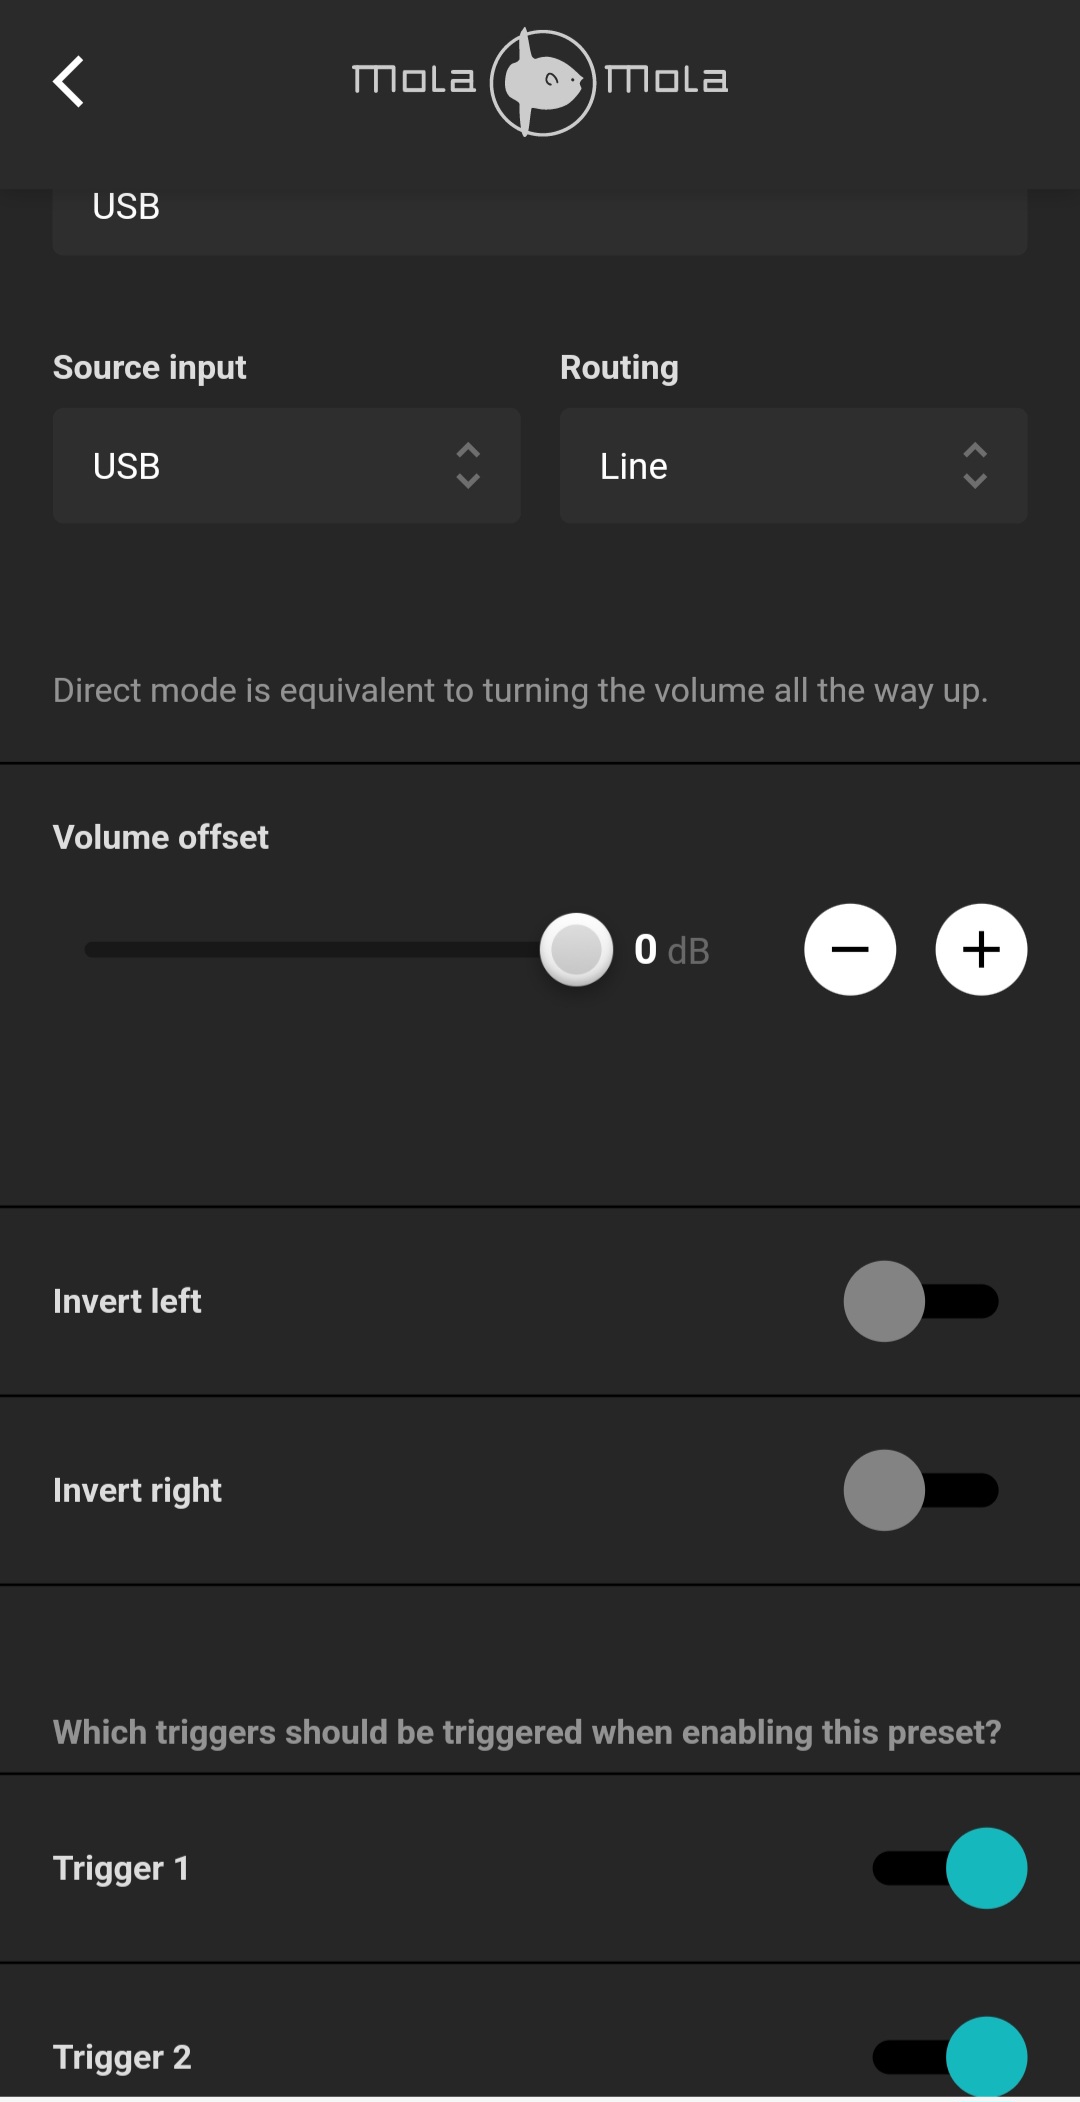
Remote app: This is where the control of the Tambaqui really shines. Configuration and optional operation is done via the Mola Mola Remote app. Available for IOS and Android, this app connects to the Tambaqui via Bluetooth connection and provides complete control of the unit. This is where the four presets (linked to each of the four buttons on the front of the Tambaqui) are configured, as well as global options that apply to all the presets. A useful feature within each preset is a volume offset feature that will allow individual presets to have a reduced volume setting compared to other presets. It is likely that different input paths to the Tambaqui will have different volume. Setting the volume offset for a particular preset will prevent needing to change the comfortable listening level each time a different input is selected.
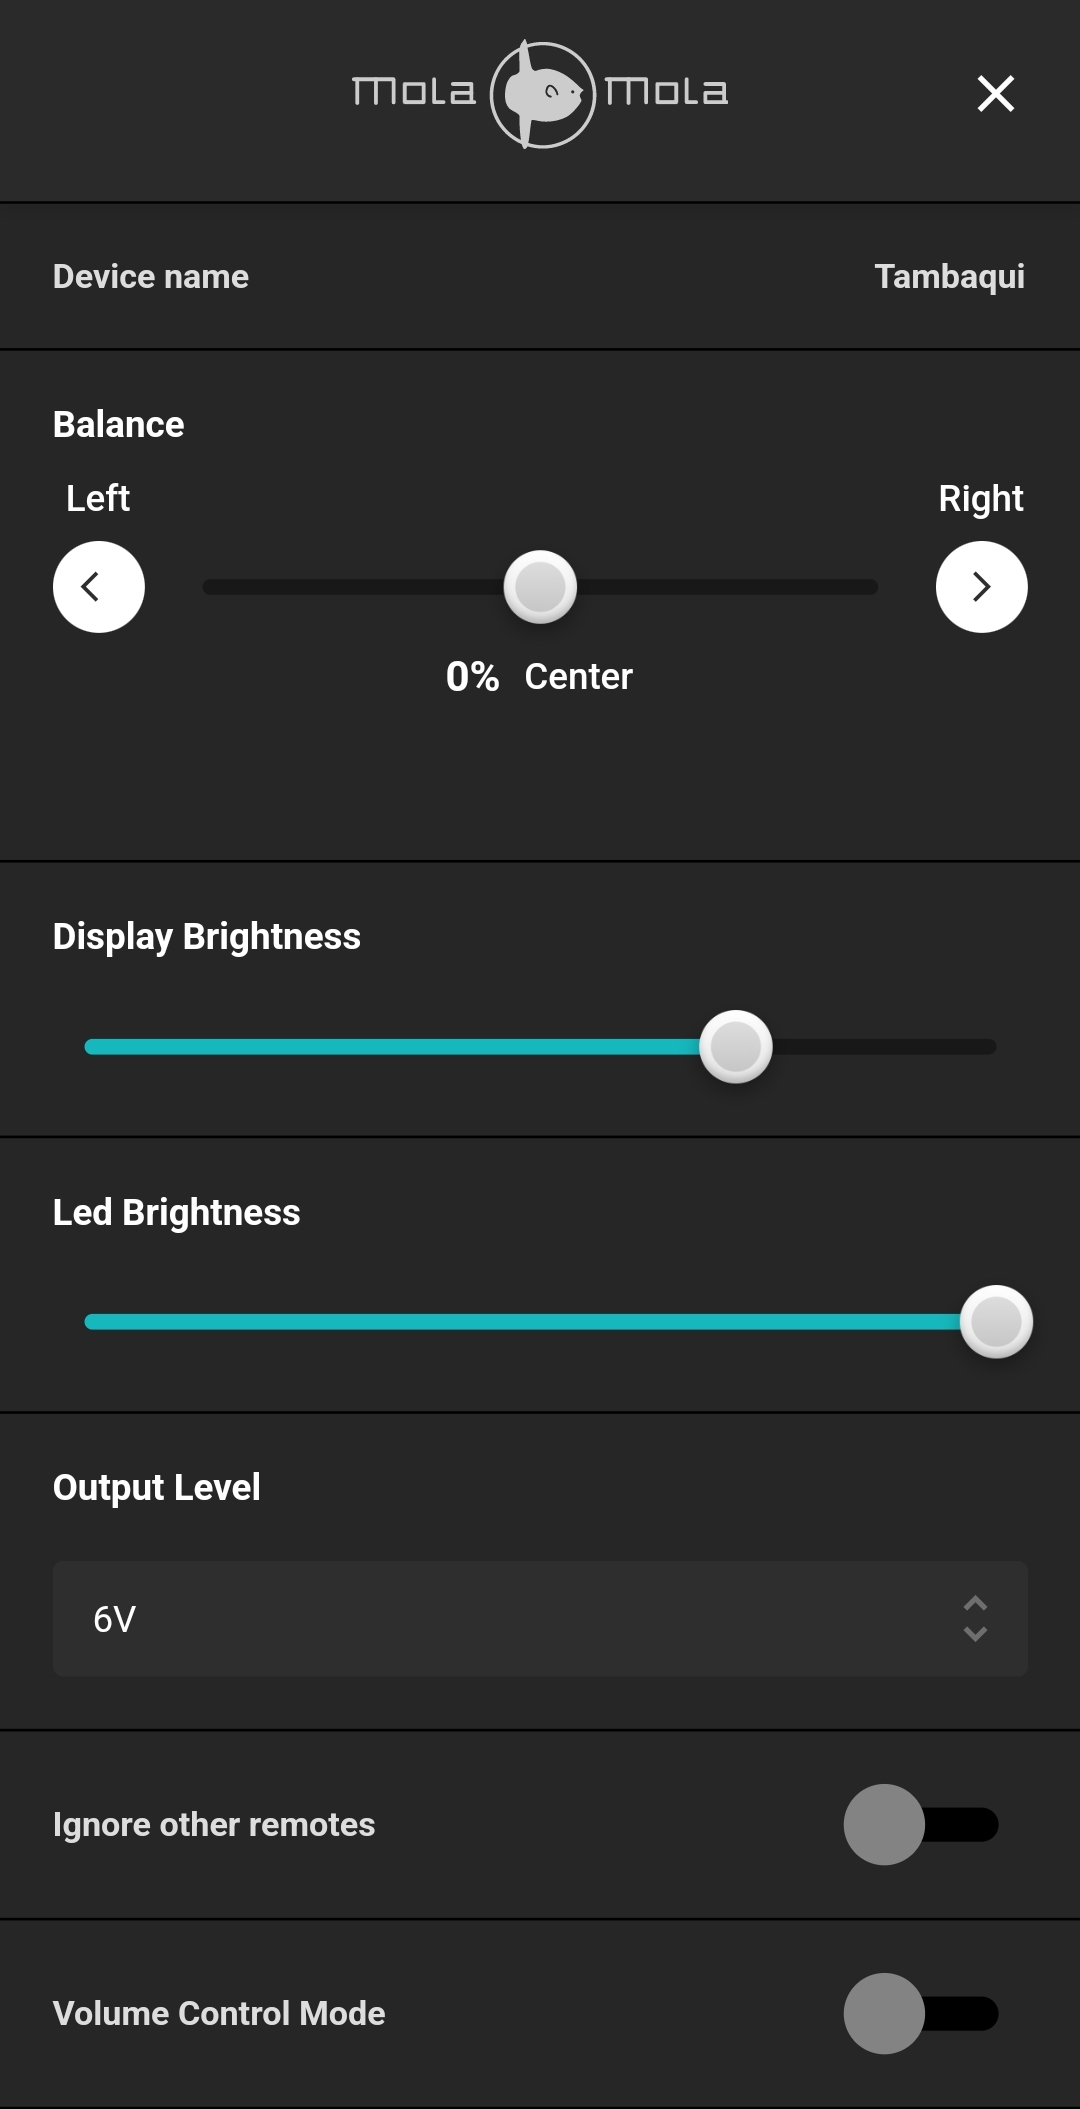

Global and Preset configuration pages
For me, by far the most useful option in the preset configuration is the ability to phase-invert either or both the left and right channels. For testing speaker wiring polarity, you can simply flip (invert) either of the two channels, and you'll instantly be able to tell if your speakers are wired correctly.
But it goes further than that. Much further. In 1988, author R.C. (Clark) Johnson wrote a book called The Wood Effect: Unaccounted Contributor to Error and Confusion in Acoustics and Audio. (Note that Clark wrote many articles for Positive Feedback in past years as an editorial contributor, before his lamented passing several years ago. He spent many years as the host of his high-end hangout, "The Listening Studio," located in Boston, MA.)

Clark Johnsen back in his The Listening Studio/Positive Feedback (print) days. (Drawing by Bruce Walker.)
In this book, Mr. Johnsen describes in detail the reality that much of the recordings we listen to are, in fact, reversed in polarity. The brief summary here is that this is caused by the fact that many sound processing, reproducing, and amplification products have the undesired effect of inverting polarity as (sound) signal passes through these devices. When you look at a sine wave, one of the obvious characteristics is that both the top half of the curve, above the center line, and the bottom half of the curve are symmetrical. In this case, phase isn't important so long as both left and right channels share the same polarity. In music, this symmetry is not the case. Import a music recording into your favorite DAW and zoom in. The arc above the center line (compression) does not match the arc below the center line (rarefaction):

Thus, if you invert both channels, they remain in-phase with each other, but they would have inverse polarity compared to the actual source. The Wood Effect (available in paper from Positive Feedback; contact David W. Robinson to procure a copy) as described in the book describes that from the time the original source material is captured by the microphone in the studio to the time it reaches the speakers in our listening environments. It passes through several mixing and mastering components, either physical devices or digital plug-ins. If the sound is processed through an odd number of phase inverting devices, the end product will have inverted polarity. If the sound passes through an even number of inverting devices (or none at all) the end product will have correct polarity.
The problem is there's no quick way to tell if the music we're listening to is phase-inverted or not unless we actually flip the polarity and compare with our ears. According to Mr. Johnsen's book, up to half of our music libraries have inverted polarity. Even if not an entire album, but track-to-track there can be polarity issues if indeed different cuts on the album were handled in dissimilar fashion. The author goes so far as to label each album in his library as to whether it is phase inverted or not, and then sets up his listening system accordingly for each album/track being played.
Well, reaching back and changing cables for each album is not exactly on my short list of things to do. Running the cables through a physical switch that can invert polarity just adds more components and complexity to the mix. With the Tambaqui, inverting polarity for a recording is as simple as two taps on the app screen (one tap for each channel). Or simpler still, by creating two identical presets. One with regular polarity. One reversed. This is the way I have mine set up. Then with a single button press, either on the remote or on the front of the Tambaqui, the same result can be achieved. HERE is a brief article from Paul McGowan at PS Audio that briefly describes the issue of inverted polarity.
Sound quality
To have a meaningful description of the sonic capabilities of the Tambaqui, we need to dig a little under the cover and see what allows the Tambaqui to produce sound that is, what I would describe, effortless. All PCM content is up-converted to 32-bit resolution and up-sampled to 3.125MHz. That's a sample rate faster than DSD64 (2.8224mHz) and a bit rate with a dynamic range of (ready for this?) 1,528dB. That would basically be as loud as the universe exploding. (So much for your reference recordings!) The loudest sound ever estimated on earth was the eruption of Krakatora in 1883 and is believed to have tipped the sonic scale at 310dB at the source. At 99 miles away from the volcano, the recorded sound pressure spike was equivalent to 172dB. You get the idea.
The Tambaqui samples at a rate faster than DSD and has a dynamic range that will cover all of your musical needs. Once up-converted and up-sampled, the signal is converted to PWM (Pulse Wave Modulation). With this conversion, the signal can be noise-shaped (can't do this in PCM) and forced well into the frequency stratosphere, far beyond limits of hearing. The specifications list a 7th order FIR (Finite Impulse Response) output stage signal processor. Addition information about this can be found HERE.
Next, there are two separate mono DACs on board that convert the signal to analog with a 130dB signal-to-noise ratio. This causes any theoretical noise-floor and distortion to drop well below what could possibly be perceived. The end result is analog that (to me) far exceeds the limitations of digital, regardless of how content is presented to the DAC. The net effect here is that everything sounds better. Standard red-book CDs come alive and high resolution source material is presented with even more clarity and breath than what I've come to expect from high resolution recordings. The specified THD is listed as "not measurable" and is estimated by Mola Mola to be -140dB.
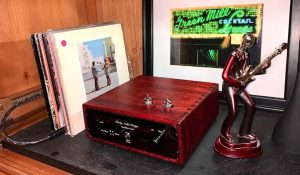
When listening, the bass frequencies were strong without overpowering. The highs were smooth. So smooth, in fact, that even at elevated listening levels they never sounded shrill or harsh. The soundstage and stereo imaging are masterfully preserved and presented to the downstream amplifiers, and you end up not only appreciating what the Tambaqui is offering, but also what your amplifiers can do with such a good set of signals coming from the DAC. The soundstage was appropriate to the recordings. Not artificially wide nor shallow. I paired this DAC with the Mola Mola Perca amplifier (which I reviewed HERE), and the combination of these two devices working in tandem was about as good as I could ask for. Everything I threw at it (classical, jazz, pop, R&B, big-band) sounded great.

The Perca stereo Amp and Tambaqui paired together
And so...
To me, the Tambaqui simply represents the best of what's available. It is feature rich, easy to setup, easy to configure, and nothing could be easier to use. The specifications are insanely good, and the end result to my ears proves that it is as good in person as it is on paper.
Tambaqui DAC
Retail: $13,500
Mola Mola
https://www.mola-mola.nl/tambaqui.php
North American Distributor
In North America, additional information on the Tambaqui, as with the complete line up of Mola Mola products, can be obtained from their authorized distributor, Bill Parish of GTT Audio.
GTT Audio
908.850.3092
Equipment list used for this review: (borrowed items are in bold)
- Mola Mola Tambaqui DAC
- Mola Mola Perca 2-channel amplifier
- AGD Duet monoblock amplifiers
- Vivid Audio Kaya 90 loudspeakers
- QLN Signature loudspeakers
- Kubala-Sosna Realization Series speaker cables
- RSX Technologies Beyond Series power cables
- RSX Technologies Benchmark Series Interconnect cables
- KECES S300+ amplifier
- Sony UBP-X800M2 CD/SACD transport
- Windows™ PC w/ Audirvāna - DSD streaming server
- PS Audio PowerPlant 15 power regenerator
All photographs by Dean Waters, unless otherwise noted. Clark Johnsen drawing by Bruce Walker.