So, you want to build a dedicated audio-visual room, but don't know where to start?
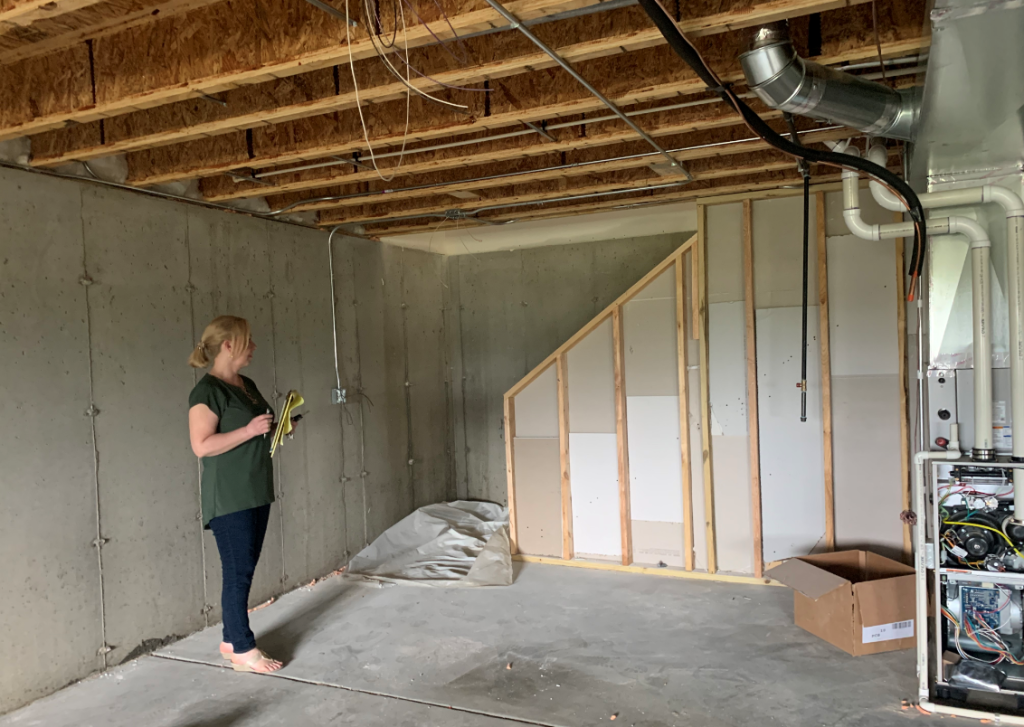
We faced that same quandary this past summer after we downsized to a smaller, new construction house with an unfinished basement, where the A/V room would be located. Having profited well from this frenzied real estate market fueled by historically low interest rates, we decided to splurge some of our savings on glamming it up.
Finally I'd get the dedicated, acoustically optimized listening room that I wanted! That is, until we realized how much our lower level would shrink if walled off into separate media, storage/HVAC (heating, ventilation and air conditioning), and family rooms. And for Belle, it was very important to have an unobstructed view of her lovely garden level windows as we entered from the stairs. Our new home was already on the smallish side, so we decided it was best to maximize our sense of spaciousness with a more open plan downstairs.
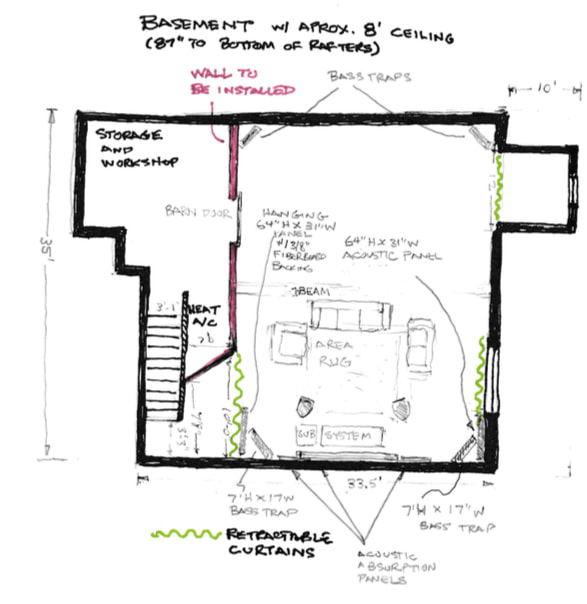
That's what I told myself, anyway. And so, with heavy sighs, I labored at drawing multiple layouts to accommodate the open space maxim and Belle's aesthetic while making the best acoustic sense. Creating an optimal symmetric listening space seemed all but unattainable, given the odd 10" x 11" alcove off to one side, the placement of the HVAC, and Belle's aesthetic considerations.
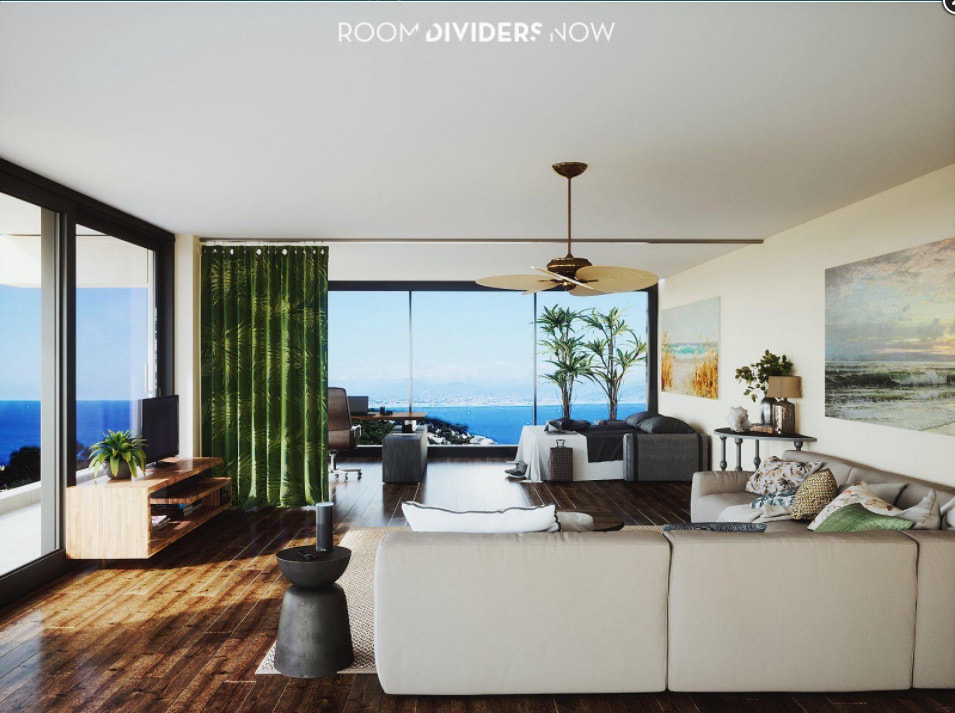
Photo courtesy of https://roomdividersnow.com
I viewed a YouTube video on room acoustics featuring animated sound waves bouncing off the walls of a side room adjacent to a listening room, causing comb filtering and other egregious sins to contaminate the larger space. To drive home the author's point, a large red "X" appears over the side room.
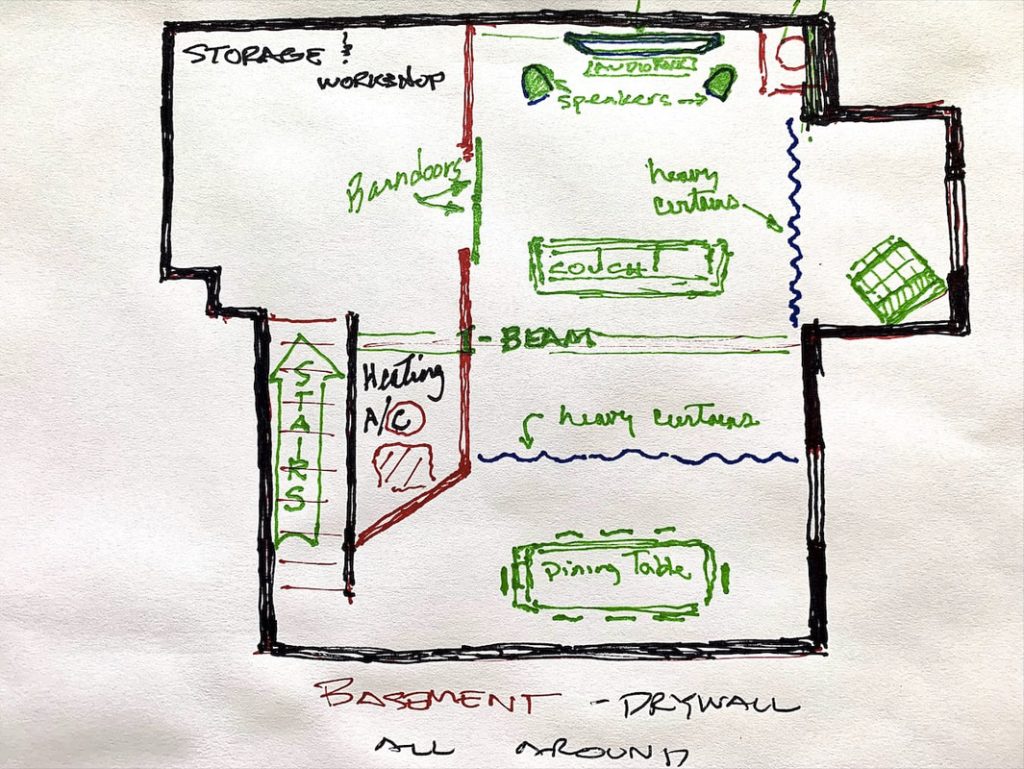
I proposed placing floor to ceiling room dividing curtains across the entrance to the alcove, the front garden window wall section, and just before the stairs entrance.
Using several variants of this theme, I ran several floor plan drawings past Belle and some industry friends, and cannot get a consensus. What follows are some of these attempts.
Panning on Floor Plans
I drafted a solution that employed heavy curtains to define the space and address slap echo and other unseemly acoustic reflections.
Not so fast! After more research on YouTube, I was dismayed. Although they will reduce slap echo, even the best acoustic curtains only effectively manage frequencies in the 200 cycle and above range (see AcousticFields.com video HERE).
Since it's best to keep the front of the room as acoustically symmetrical as possible, this isn't good enough. Unfortunately, with the configuration of our unfinished basement, there wasn't much to work with, either.
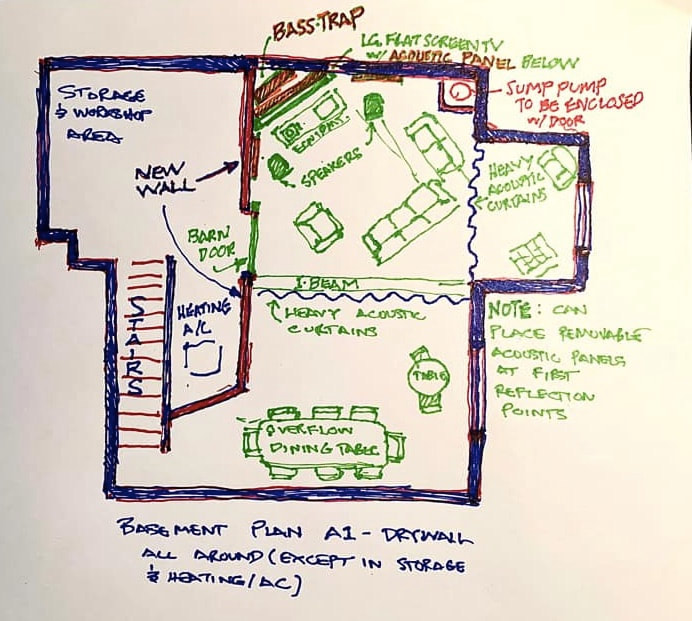
I drafted another floor plan that appeared to address this problem best, as the two front sidewalls are very close to evenly matched in the diagonal configuration above. However, after talking with a seasoned pro in the field, Straight Wire's president Steven Hill, I was convinced that the side walls—which are virtually non-existent—were far from ideal.
"Why do you need a dining table there in the first place?" he asked, referring to Belle's treasured 11' designer dining table that doesn't fit upstairs, but works fine in the basement for the occasional large family gathering.
"Come on, I'm married to Belle," I thought. "That's a non-negotiable."
Steven suggested that I place the A/V system in the alcove, as ultimately it offers the most symmetrical front and sidewalls configuration. However, that's verboten as Belle wanted that unobstructed view of the nook's window from the stair entryway—TV and audio equipment be darned!
After several days, I have an epiphany: place one homemade 64" H x 31" acoustic panel with a 3/8" thick fiberboard backing on the side by the stairs, along with a 7' H x 17" W bass trap; the opposing side would have the same along the front sidewall and corner (see updated drawing). Of course, the panel and bass traps could be tucked away in storage when I am not engaged in serious listening, thus soothing Belle's aesthetic preferences!
Although the 3/8" thick fiberboard doesn't match a solid wall, it will reflect a wider bandwidth than a thick curtain would. And the remaining exposed curtain mimics the one on the opposite wall over a long window.
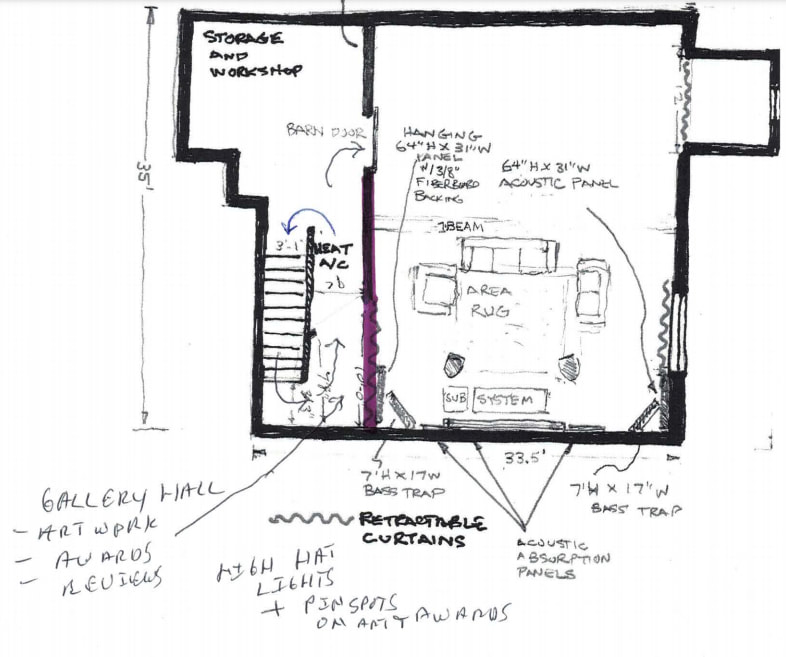
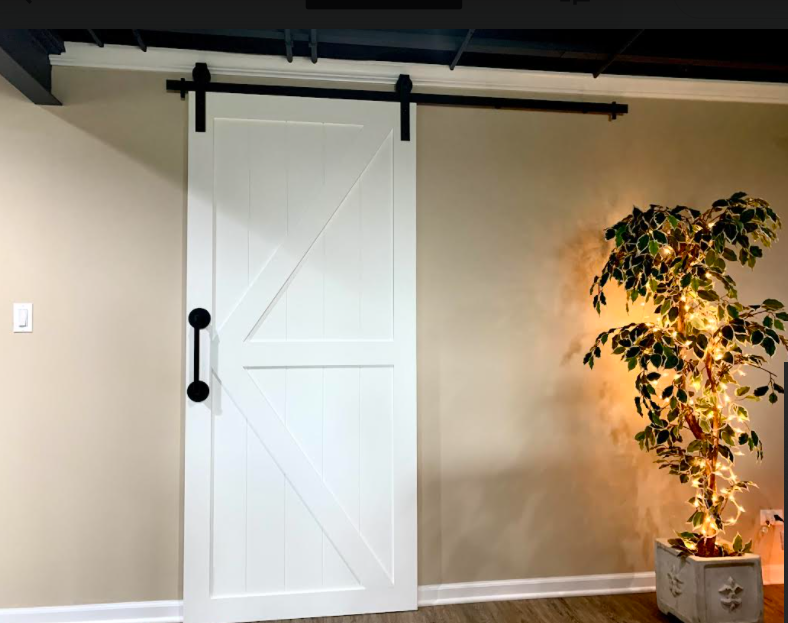
Hold the phone! Jerry Willsie, Director of Sales at Straight Wire, Inc., suggests building out a hallway extending from the front wall back to form a hallway, where photos and paintings can hang, with a nice barn door opening up to the listening area (see the photo above).
"That would solve a lot of your acoustic problems," he offers, adding that it would also make for a terrific interior design aesthetic.
Elaborating on his proposed basement schematic with his modifications, Jerry suggests:
- Put the AC/Heat unit under the stairs or in that area.
- Bring the wall all the way down—way better for your audio play room.
- Turn the hall way into a gallery of awards, posters and so on.
- High hats and pin spots on the art work / awards—reviews.
That way, he writes, "you pique a persons interest before actually entering your listening room," while showing off some of my accomplishments such as artwork, plaques with accomplishments, and photos (see diagram above). I like that a lot! However, relocating the heating and A/C units under the stairwell are too costly for our budget, and summarily torpedoed by my better half. Besides, they'd block the view of the garden windows from the stairs which, she reminds me, she would absolutely hate!
As I struggle with frustration, I find encouragement from an unlikely source.
Here's to You, Mr. Robinson, Jesus Loves You More Than You Will Know
I watched yet another YouTube video—this one by popular audio and video equipment reviewer, Andrew Robinson—and nearly fall off the couch when I hear him say the following:
"One of the biggest regrets that I have...(is that) I built a room that was dedicated to being nothing but a critical listening and movie watching space. A dedicated theater that I never used—and that no one ever used. That was awesome for like five minutes. And then everyone found themselves in the living room. (Andrew Robinson. "A REAL Audiophile Listening Room." HERE)
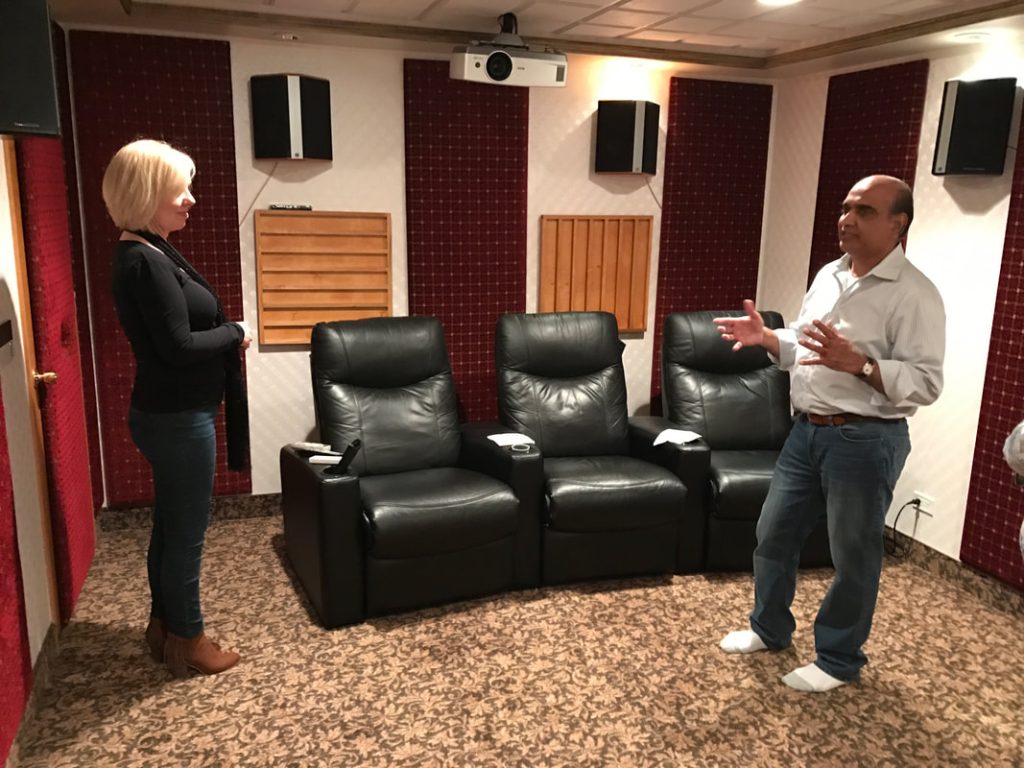
Belle chats with my friend, Chris, circa 2015 in his dedicated listening A/V room.
My mind races back to a dedicated A/V room that friend and Foster Electric executive, Chris, built in his basement some years back that's seldom used nowadays. Hearing Robinson's cautionary tale rings true and helps ease the cognitive dissonance between wanting to please Belle and desiring a space for great acoustic performance. This way should do both, affording us ample space to relax with family and the grandkids, and having a comfortable and attractive environment where we both can maximize our listening and viewing pleasure.
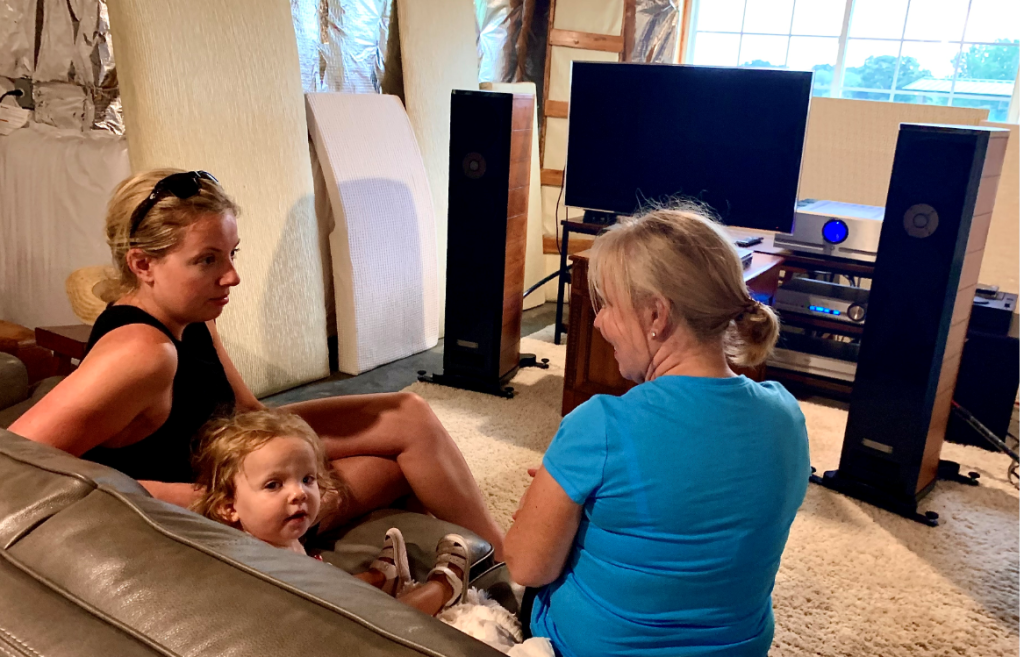
Belle, at right, visits with our daughter and granddaughter in the makeshift listening space prior to our renovation.
You be the Contractor
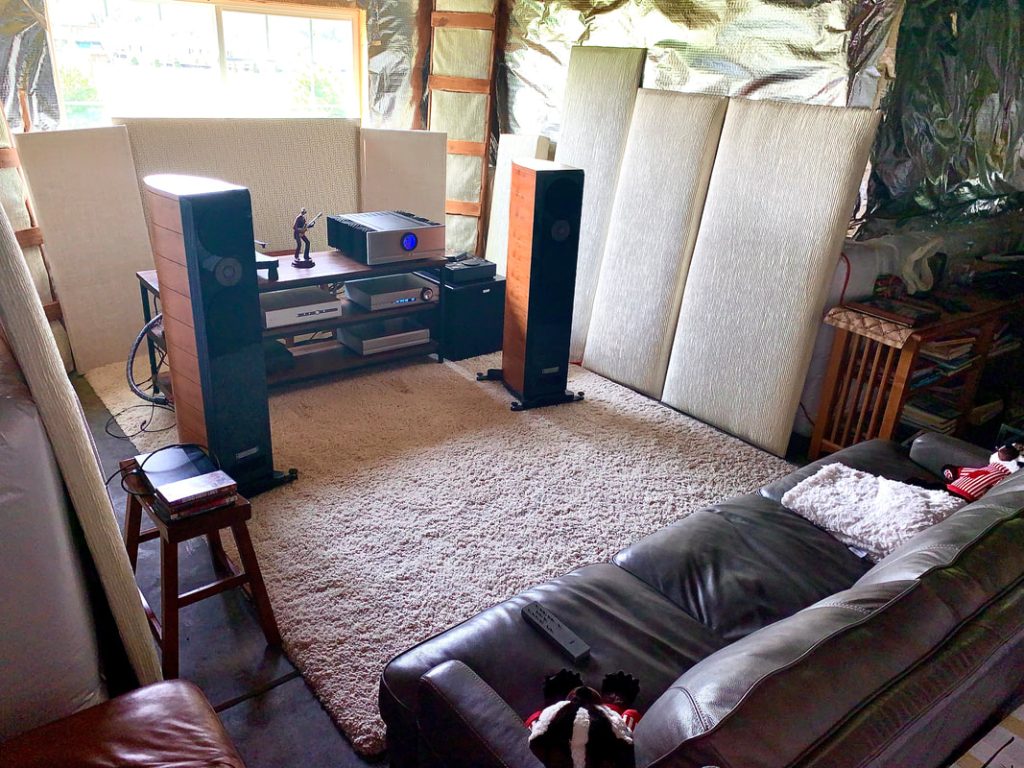
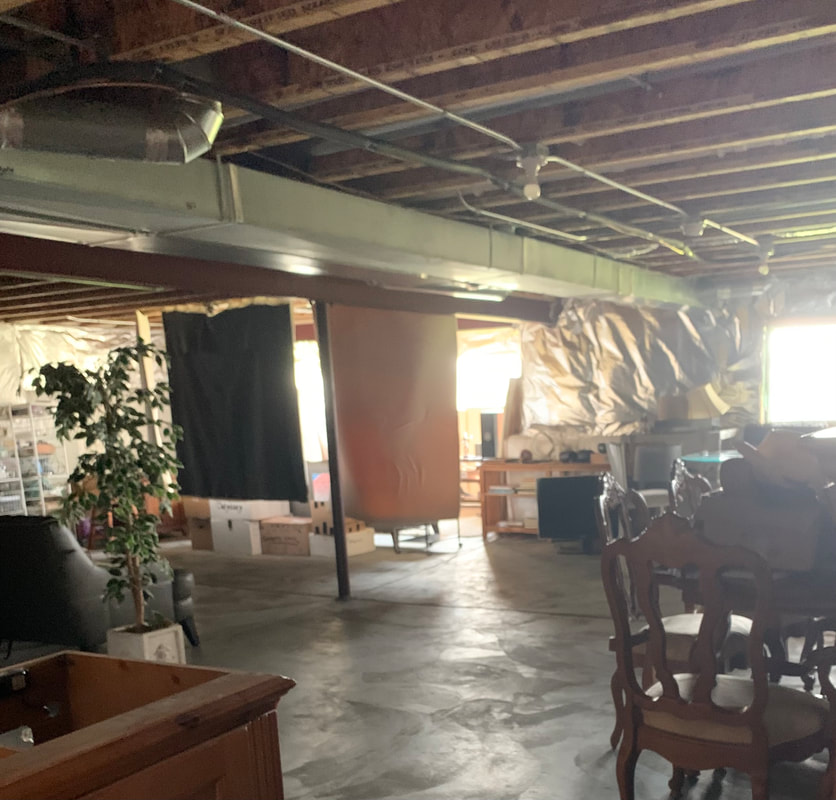
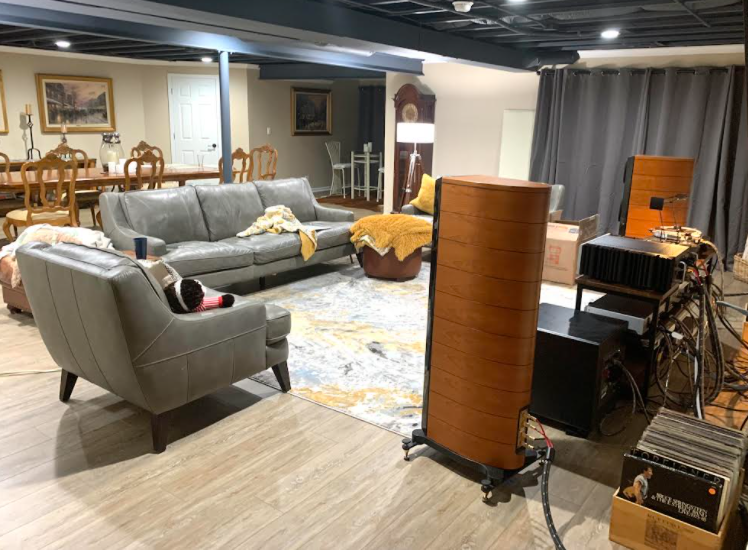
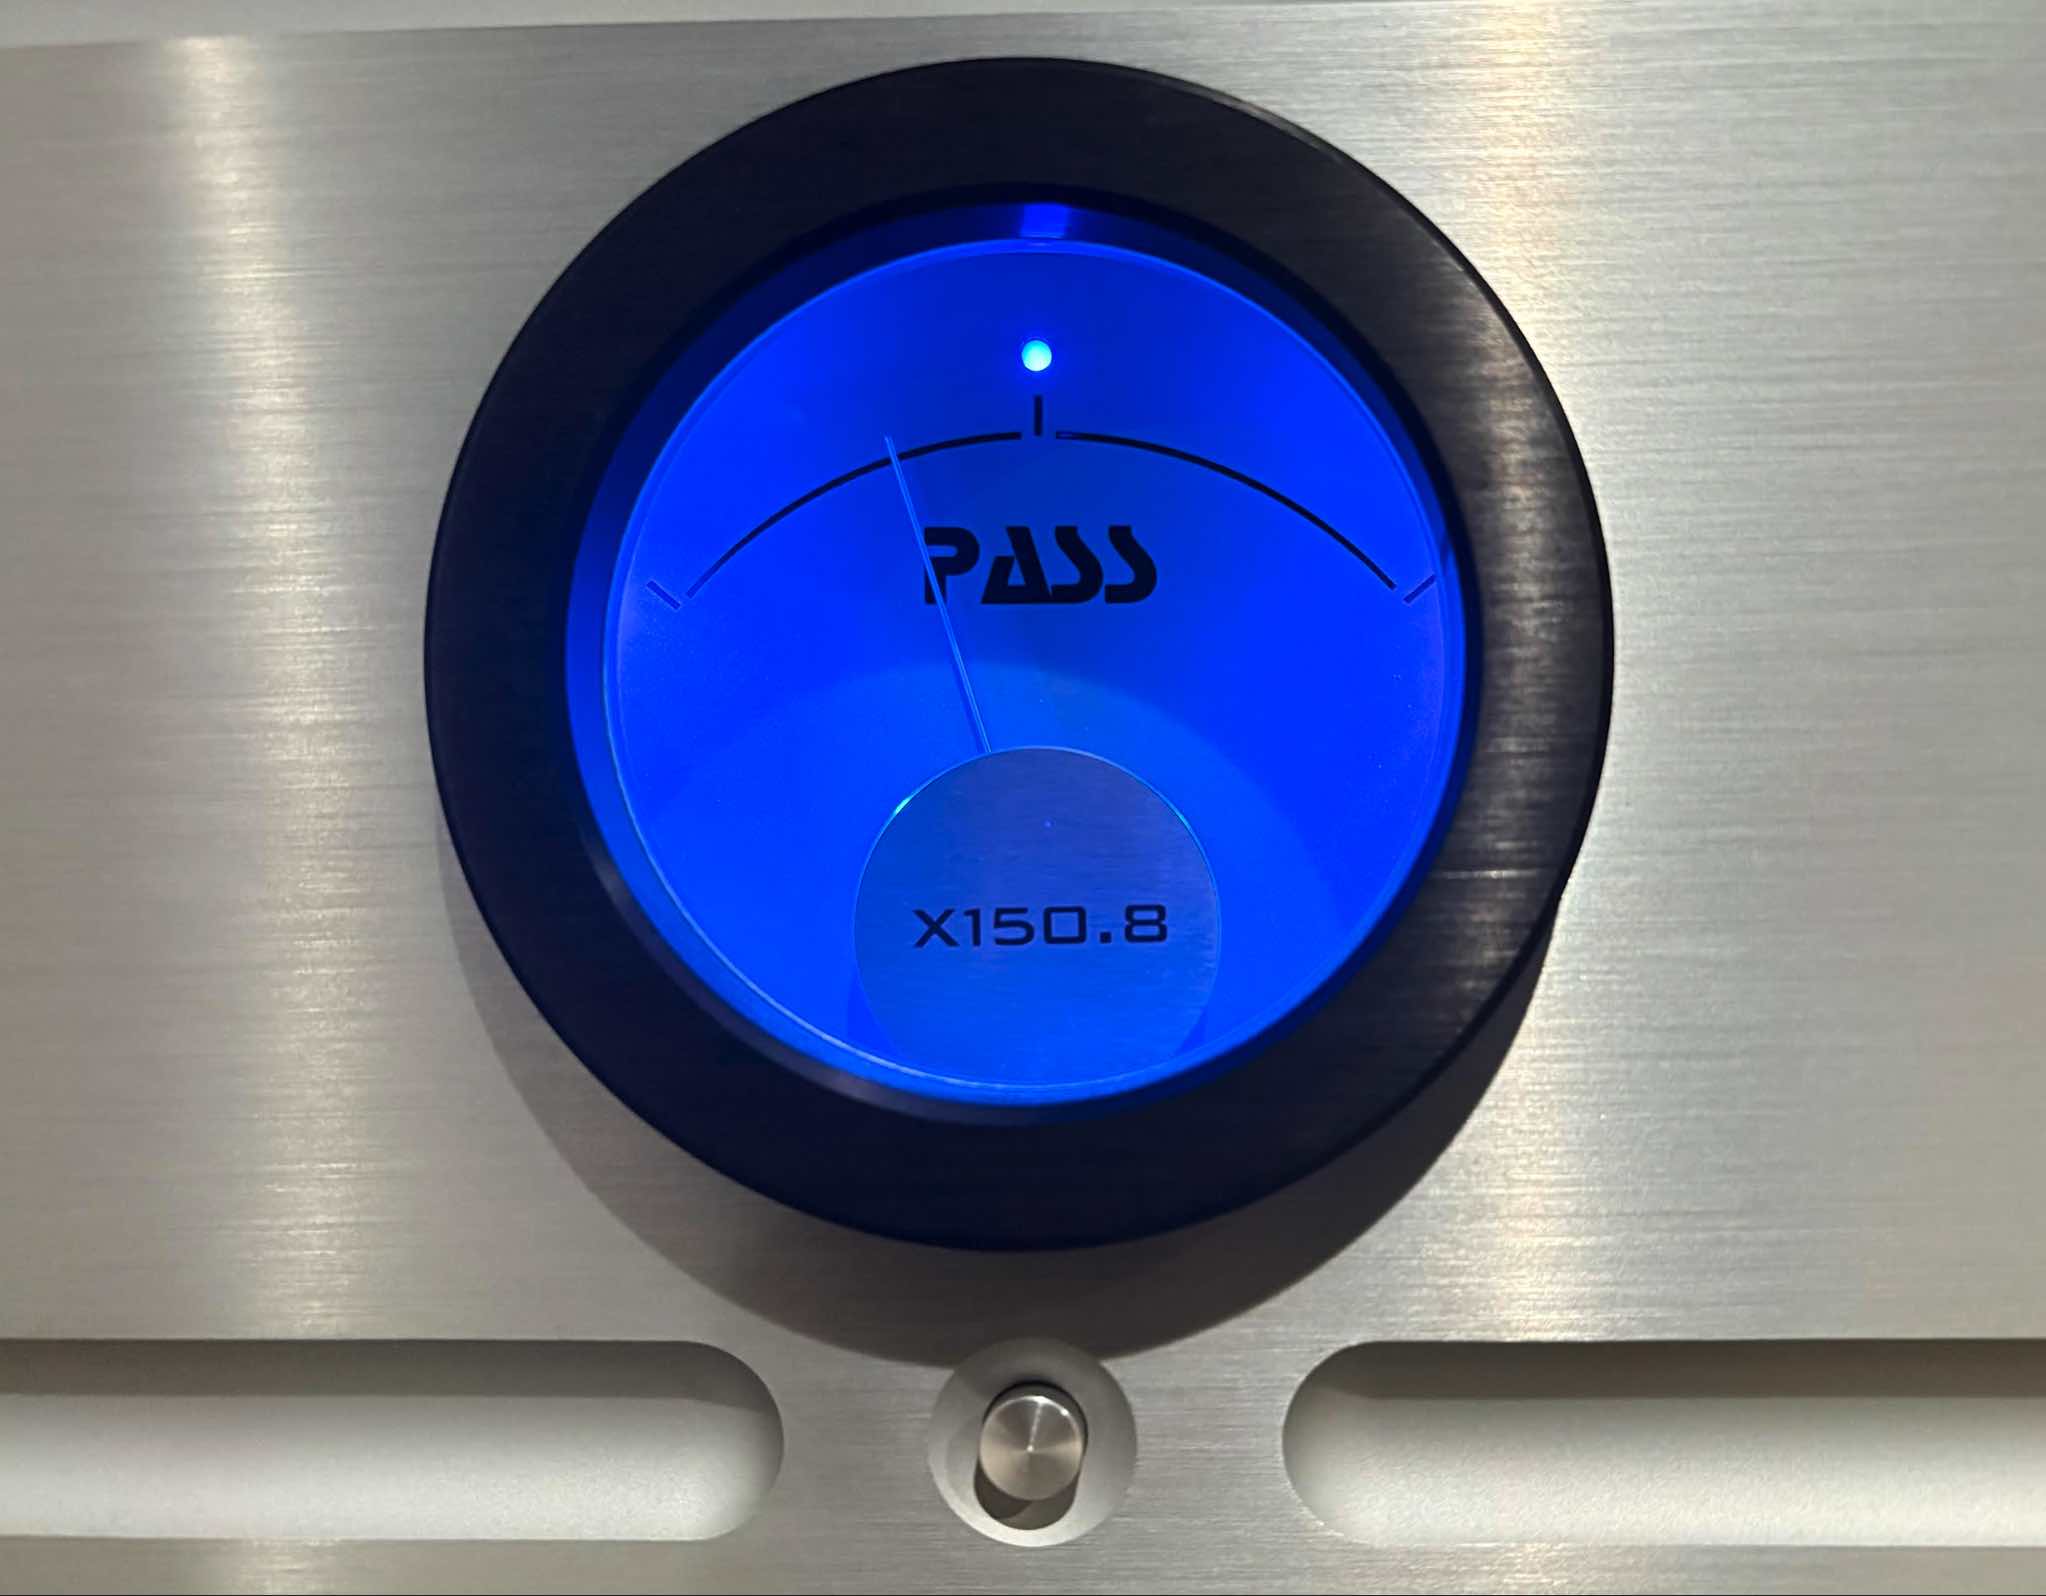
When we moved in, the sparse, concrete basement had three AC outlets–one for the sump pump at the rear and two in a small steel box bolted to the circuit breaker panel in the middle of the front wall, from which I ran two heavy duty indoor/outdoor extension cords to the towards the alcove at the rear left side; one connected to a Pass Labs X150.8 amplifier and the other to a Panamax M5300-EX power conditioner feeding other electronics on a Simpli Home Skyler media stand and a Hsu Research ULS-15 subwoofer next to it. A pair of tall Usher Audio Mini Dancer 2 speakers flanked an 8' x 10' shag rug, acoustic panels lined the alcove's walls, and a leather couch for listening was parked at its entrance. Sometimes, we watched a small TV in that intimate space for a more immersive experience.
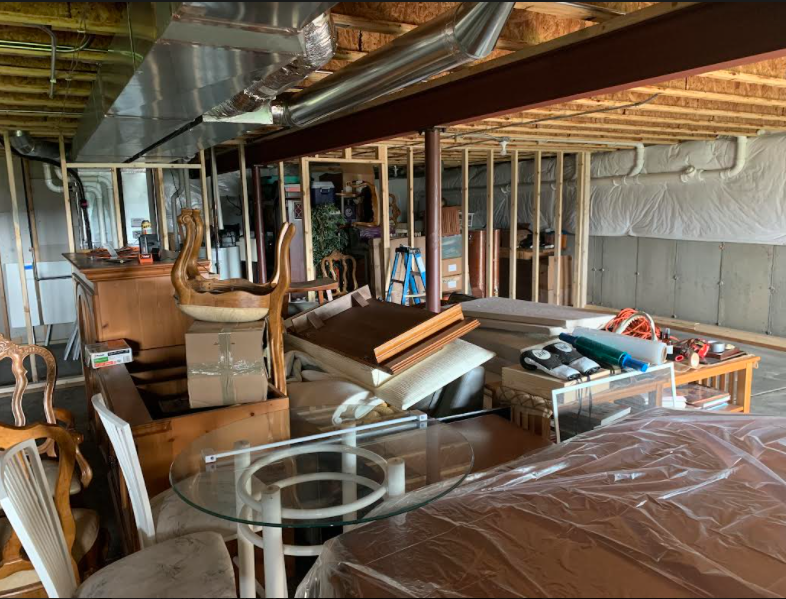
As we settle in, tables, chairs, lamps, boxes, and packed storage shelves crowd the walls and floor of our basement, while a makeshift acoustic curtain is draped behind the couch to minimize sound wave interactions with the cavernous concrete environs. It's a huge mess.
We leave voicemails with several basement finishing contractors that our developer recommends, but, they aren't returning our calls. Guess they're swamped serving the scads of homeowners needing basement upgrades in this crazy real estate market!
Belle enjoys the view from the deck of Mike and June's boat.
Then, we meet with my old church friends, Mike and June. The owners of a lucrative commercial flooring concern that works primarily with school districts, hospitals, and bigger businesses, they join us for dinner and take us cruising on their 40 foot power boat on Lake Michigan. And when Mike hears that we are considering hiring a basement finishing specialist, he scoffs.
Hanging acoustic curtains form a semi-circle behind the couch at the entrance of the alcove.
"Don't just hire one guy who says he does it all," Mike says. "No one does; they just hire other guys who subcontract for them. You can be the general contractor and save money." The catch is the time and effort involved in planning, collecting measurements, then reaching out to the various parties—the electrician, plumber, the guys who put up the studs and drywall, the heating and air specialist, painter and others, taking their bids, costing it out, then dealing with the actual construction process. This is going to take some doing.
I begin to sweat. "Ahhhh, I've never done this before," I say. "I wouldn't even know where to begin."
"I've got the name of an electrician who runs the HVAC for a large high school district," Mike assures, adding that he has other qualified laborers that he can refer to me and can advise me as the need arises, as well.
Surveying our basement, Mike suggests mounting drywall on the ceiling for a more polished appearance, but Belle and I have our hearts set on the industrial tinted exposed trusses, joists, beams and ductwork look that's currently trending—however, instead of painting the rafters black, we prefer the blue-gray that we admired in our oldest son's family room.
Moreover, for ideal music listening acoustics and ceiling height, it's often been suggested that higher is better. In my basement, the bottom of the joists above are just under the standard room height feet, so adding a sheet rock ceiling would make it even lower, whereas leaving it open would increase it to roughly nine feet, with the added benefit that the joists and ducts break up the flat, even floorboard surface above, helping diffuse sound for better sound reproduction.
Friends in High Places
It's time to get going, so with a rough idea of what we want, I contact Mike's guy, Ron, an electrician who runs the HVAC department of a major suburban high school district. He's a wiry, energetic man with a quick laugh who attends church on Sundays and does side work "for friends and friends of friends," as he puts it, and that keeps him plenty busy and in the good graces of his wife, who expects him home for dinner and some "me time" on weekends (hence, he declines the sharing of specifics about him in this article).
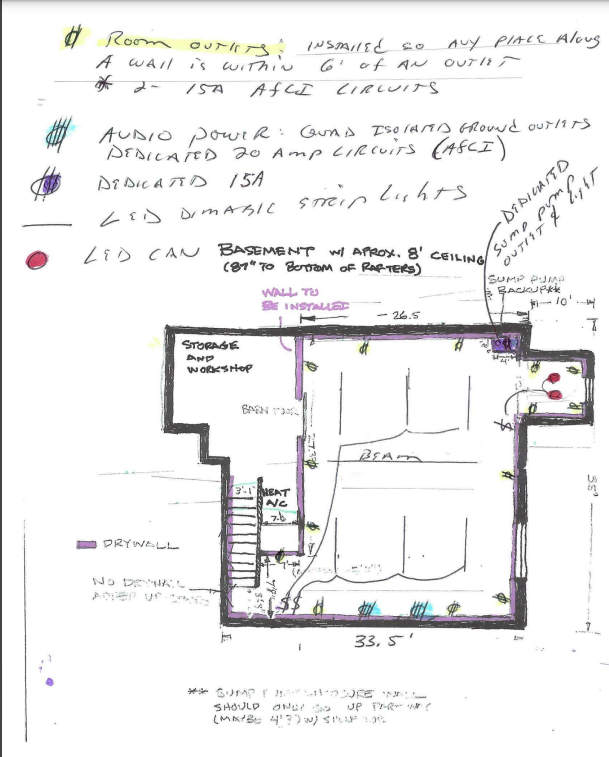
Early on, I decide that I want two dedicated 20 amp circuits (primarily for high current amplifiers, as well as other electronics) and one dedicated 15 amp circuit for A/V, while lights and general use AC outlets will run off other circuits. I will be using hospital grade AC outlets for the dedicated AV circuits, with orange colored ones on the 20 amp sockets.
To help ensure that the job gets done right, I get input from Steven Hill, who not only runs Straight Wire, Inc., but is armed with a wealth of knowledge from coursework he studied in electronic engineering while attending the Wharton Business School at the University of Pennsylvania. He emails Ron and me on the particulars. Below are some of our correspondence:
Steve Hill
Dear Ron & Juan,
By dedicated, need direct ground back to circuit breaker box for each circuit—not daisy chained
As indicated by Juan—placing them on side away from dryer, sump pump, and noisy items would be great
Want to balance the breaker box—for actual usage—not value of circuit breakers—as long as the variation on left and right is under 25%—it should be good.
RON
No problem. Was planning on installing a dedicated circuit and neutral with an isolated ground outlet and wire for the AV equipment . That with keep the grounds for all the AV equipment separate from the metal raceway which is bonded back at the panel. Depending on the installation the circuits in a house most likely share a common neutral, which will Limit me to what can be moved around to balance the panel load. Not to mention that in residential panel there are very few continuous loads to balance. The loads tend to follow the occupied areas throughout the day. We can configure the outlets however you want ... either making one of the quads a 20A circuit and the other quad the 15A circuit or we can have one outlet of the quad one circuit and the other outlet the other circuit. These are all details that can be worked out as we move along the way.
SH
Dear Ron,
Your comments are rare and spot on.
WOW—since they don't have high amperage HVAC and other high amp/ noisy items are used infrequently—circuits should have little issues
Just curious the resistance of whole house ground—assuming it is not far from panel
Many builders use small ground rods and we find resistance over 20 ohms!! You can get back feeding of noise?
Steve Hill
We now have a firm direction, so Ron stops by to assess the job, and as while surveying the basement, he suggests a skilled carpenter who works with him and is interested in framing the walls and putting up drywall.
"His name is Tim, and coincidentally, he builds custom drums that have unique sound characteristics," Ron says.
Wait. "Is that Tim Fischer?" I ask.
Tim Fischer, at right, at a 2009 Son City reunion, Willow Creek's youth group where his wife, Jill, served as a team secretary in the 1970s. (photo by Ernie Hagenow)
Turns out, he is. Fischer had served as a longtime drummer on the main stage at the mega worship center, Willow Creek Community Church, where I'd met him circa 1980. Back then, he was a talented musician with rugged, boyish looks, a meaty, vice grip handshake, and a penchant for the ladies. Now a devoted father and husband, he is quite an accomplished carpenter. I knew that he worked at a school district, and that he was building custom drum kits (you can view his site HERE).
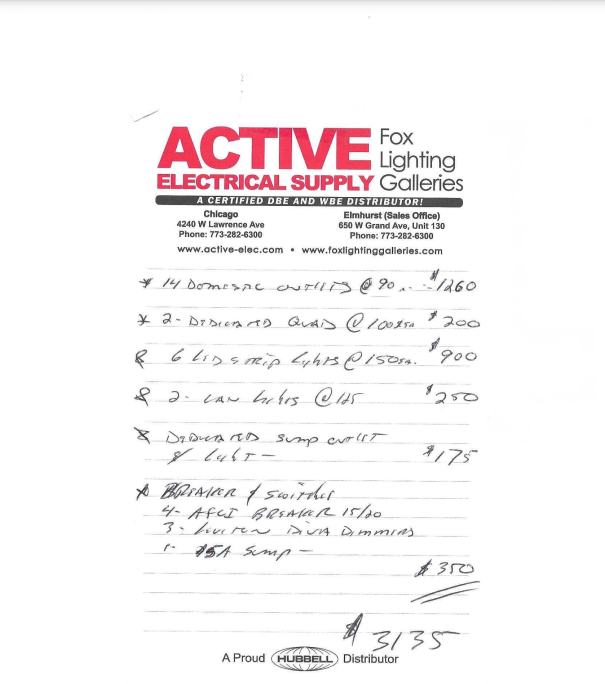
Having seen some of Tim's woodwork in a custom home remodel years ago, I am getting more confident and excited about our project. After discussing our needs, Ron and I put together a working plan and he offers me the quote below:
In addition to the dedicated A/V circuits, Ron is going to install several dimmer switches, a series of can LED lights overhead, and 14 domestic AC outlets.
The main space will be 32' x 22', with the listening/AV space occupying the front half.
Next up, it's Tim's turn: he gives us a quote (he requests that it remains confidential, as it's a friends/family pricing) and after our friend, Mike, confirms that it's very fair, we agree, and file for a home improvement permit with the village that runs us roughly $30. Turns out there will be five inspections: one for the framing, another for the insulation, then electric, drywall, and—lastly—the completed project.
Belle and I move our furniture to the center and storage/HVAC sections of the basement, as Tim will need plenty of space to build sections of wall framing on the floor, then tilt them up and secure them on the wall.
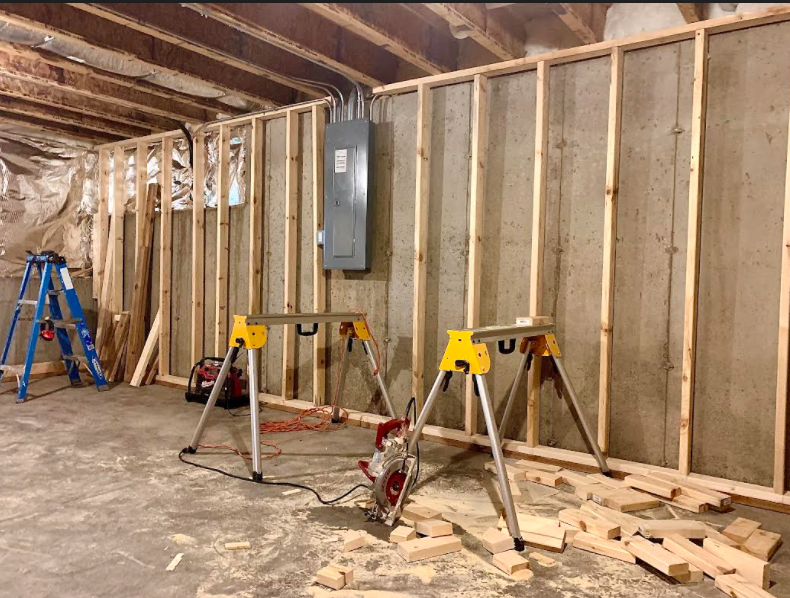
Several days later, Tim arrives with his SUV and work trailer, which is stocked with equipment and stacks of 2" x 4" lumber. I help carry and stack the wood on the basement floor as he passes it through a garden window. Setting up his table saw, he begins cutting.
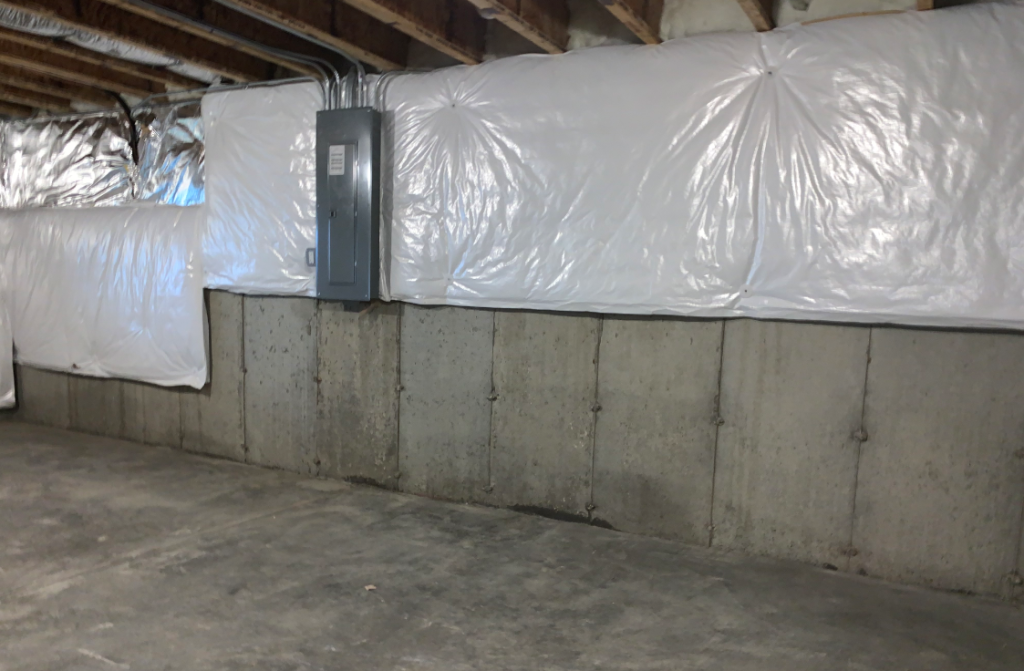
But before he posts up the framing, we must tear down plastic sheeting covered insulation that covers the top four feet of the surrounding concrete walls. I assist with this chore, which isn't very difficult (it pops off these plastic retainer washers), then carry help carry it out to our garage, where it sits in piles before Tim and I transport it and wood refuse in his trailer to a nearby dumpster (Belle and I live in a new construction neighborhood, where the project supervisor allows us and other residents to use new builds' dumpsters, saving us thousands). We catch up on friends, family and old times, and he speaks with pride about his son's achievements in a college drum corps program during these jaunts.
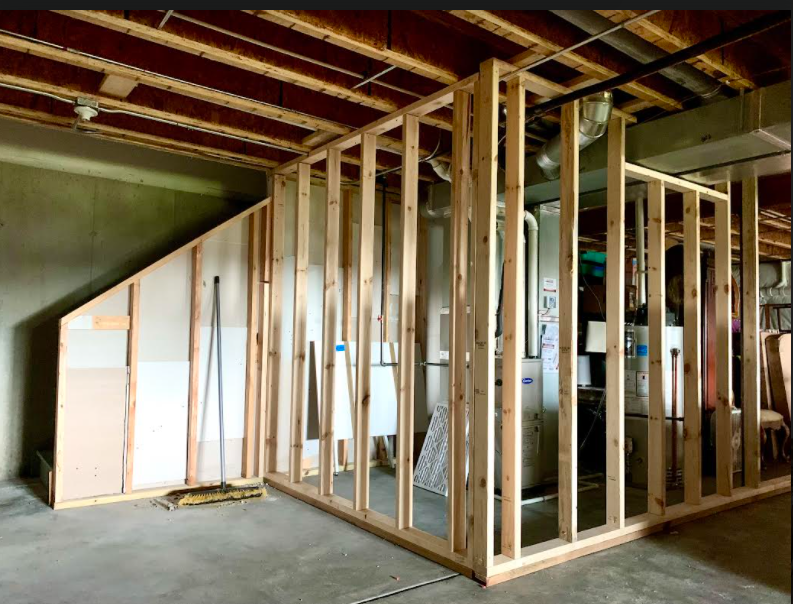
The framing begins going up fast over several days. A squared off wall separates the main room from the HVAC/storage space with a space for a sliding barn door halfway down the side, and there's an angled room with a doorway for the sump at the rear left corner of the main room.
Then, after the framing passes inspection, Ron arrives with an assistant and begins, over a couple of evenings, bending and installing conduit and metal AC outlet boxes. Can lights go up next.
Barn Door is Open
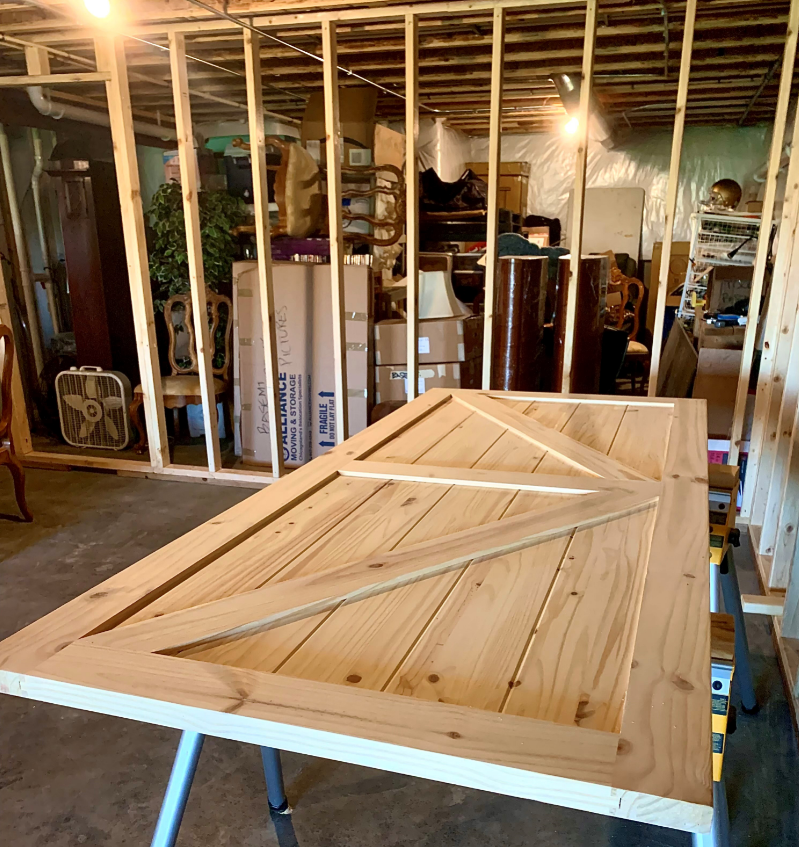
Belle and I go shopping for a sliding barn door and, after balking at the more expensive, hollow core offerings at Home Depot, we find a much more affordable, pinewood door and accompanying hardware at Menards (in all fairness, Tim uses Home Depot for all the lumber). While we wait for Tim to return, Belle primers and brushes on four coats of white paint on the door, using Tim's saw horses to support it while it dries.
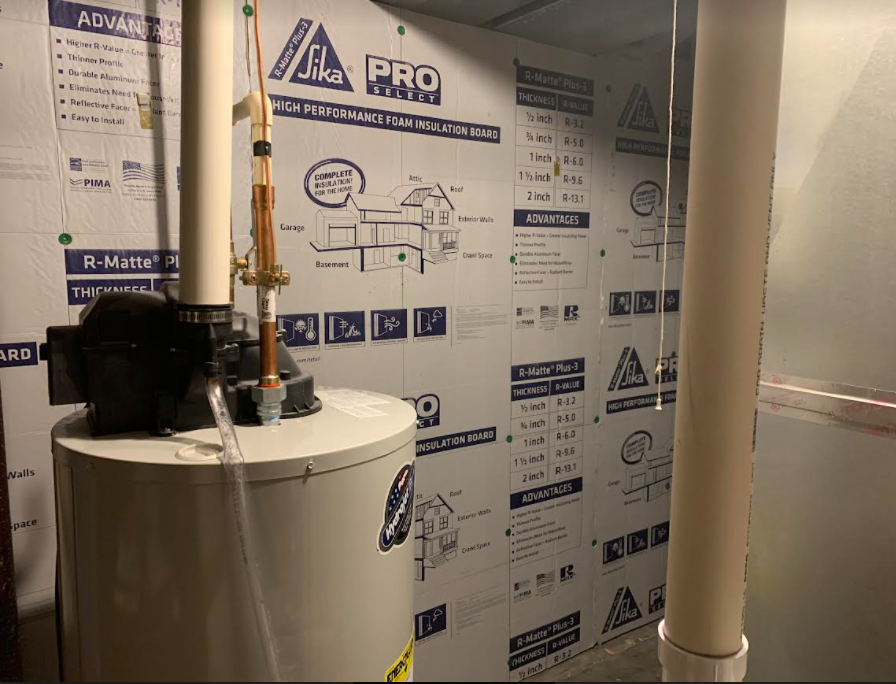
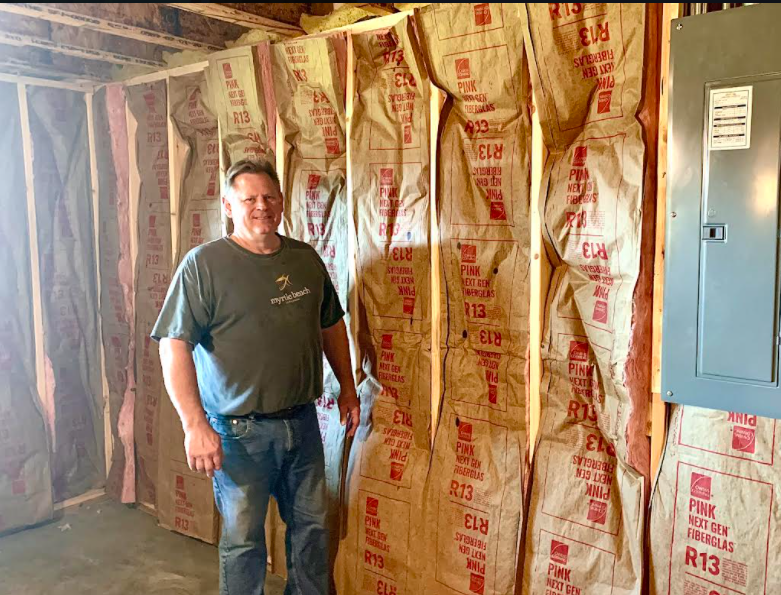
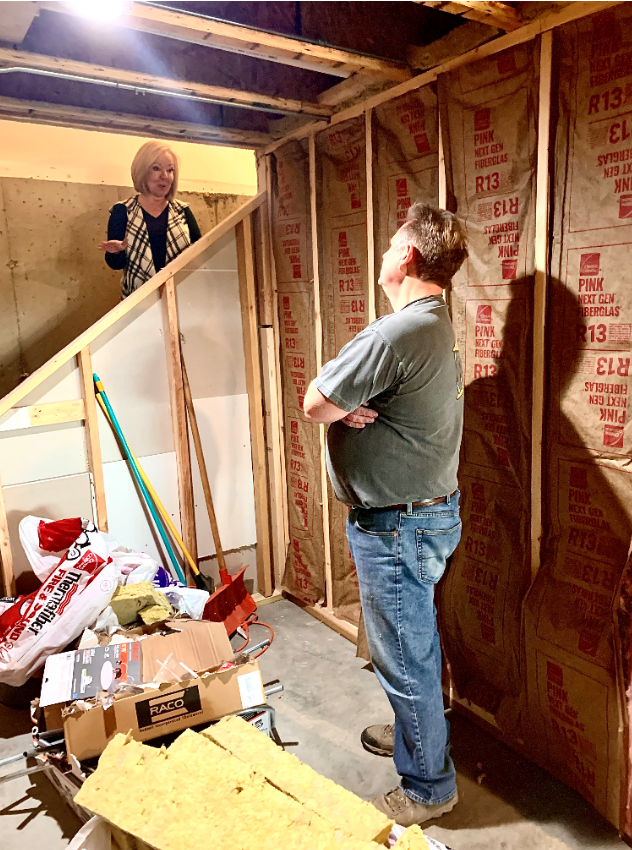
Soon, Tim returns and installs pink insulation on all the walls surrounding the room—save the front and first 10 feet of the wall separating the main room from the HVAC/storage room; at Steven's suggestion, Tim installs a high performance insulation board to decrease sound transmission from the furnace and air conditioning to the listening/AV space. We select half-inch thick Silka Pro Select, which is roughly a third of the cost of a bigger name brand with its superior 3.2 R-rating.
That's Tim Fischer standing in front of the newly insulated front wall (he staples the paper edges later to the framing)
Tim chats with Belle while installing insulation.
Drywall Dust Up
We are warned to plastic wrap our entertainment armoire, and box up and seal anything electronic, as the fine particle dust generated from cutting and installing drywall is insidious, and can really harm mechanical and powered equipment.
"I ruined a nice vacuum cleaner several years ago after putting up drywall," he says.
Taking him at his word, I plastic wrap my speakers, and seal electric equipment in their boxes and other valuables.
Tim likes these drywall contractors that he hires for their efficiency, but warns, "They're all business and can be rude." The truth is, Tim is a talker, and they're not. Turns out, Belle finds them polite and, to our delight, they are in and out in two days. All done!
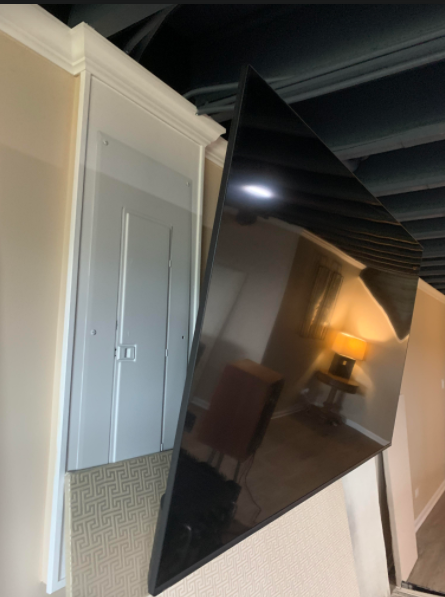
Framed Circuit Breaker Box
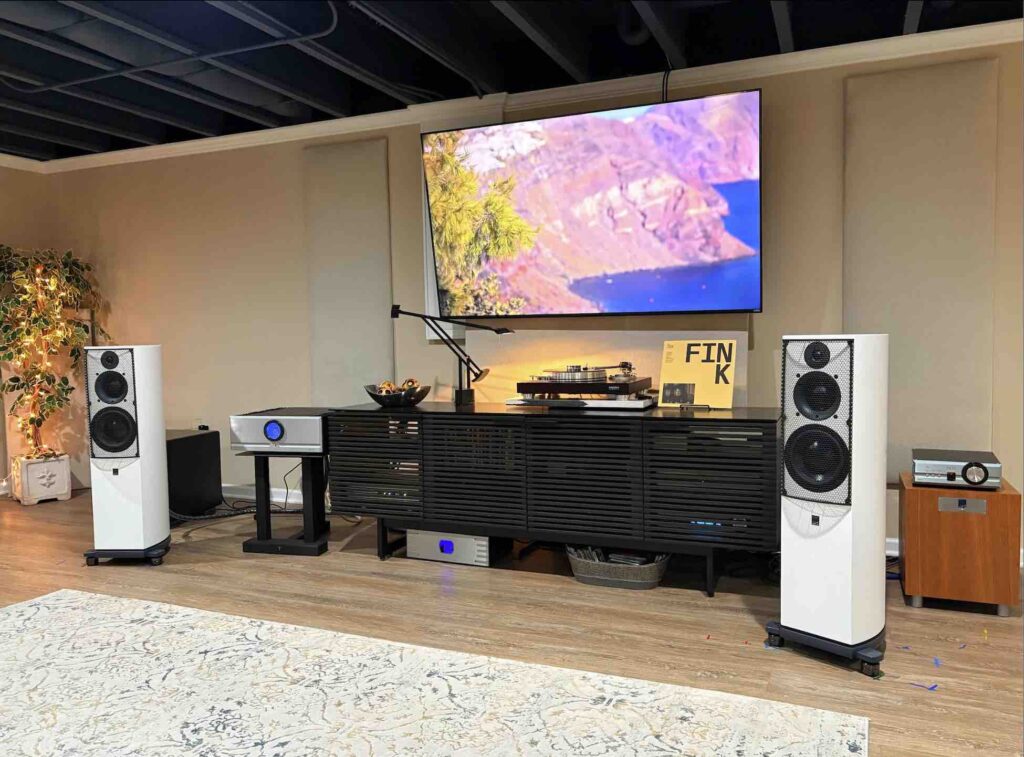
Tim creates a nice, box-like exterior frame around the circuit breaker box. Extending down from the ceiling line, it envelopes the protruding box, integrating it into the wall structure seamlessly. Moreover, our brand new Vizio M-Series Quantum 75" TV (roughly $1,000 with holiday sales price at Best Buy) will be mounted on studs just to the right of it and will swing to the left and hide the box, courtesy of an ECHOGEAR Full Motion TV Wall Mount for Big TVs Up to 90" ($139) heavy duty pivoting and moving wall mount, but will pivot out of the way when panel access is needed.
A Crowning Touch
Scrubbing the internet for ideas, Belle discovers the beauty of crown moulding in an exposed painted basement ceiling like ours. It oozes sophistication and creates a more pleasing and clean, visual break at the boundary between walls and ceiling. Tim agrees, goes over the specifics with us, and applying his great craftsmanship, negotiates the twists and turns at various junctures with aplomb.
Stairway to Heaven
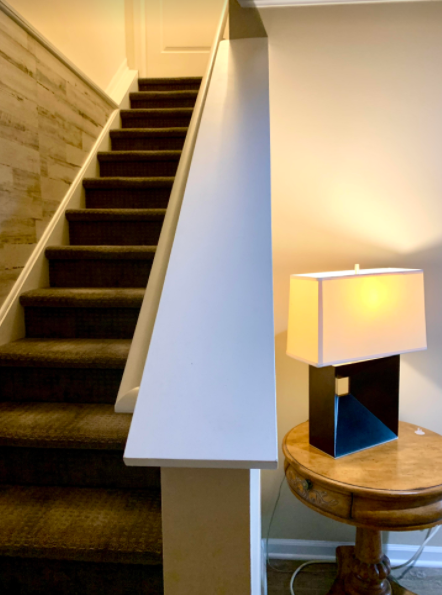
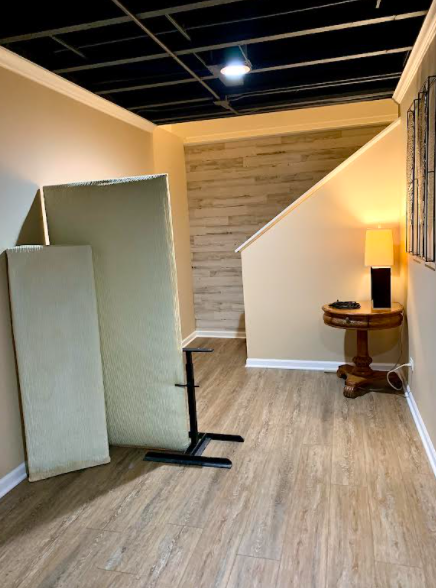
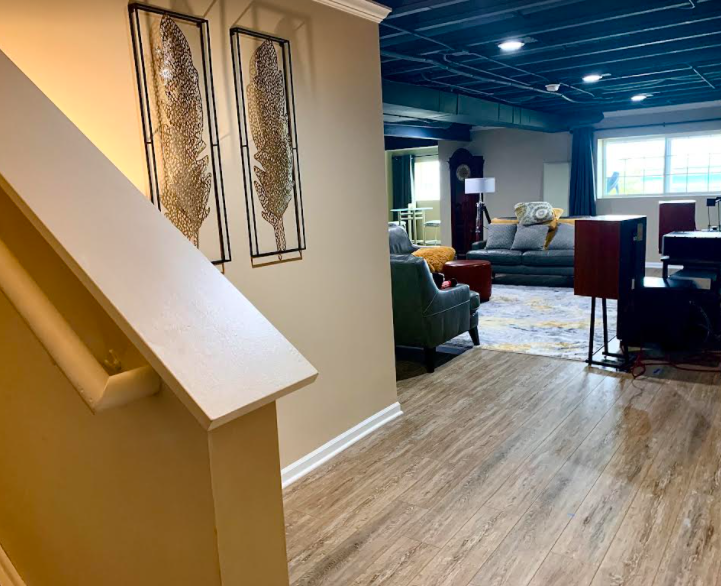
In the stairwell leading to our dream AV and family room, there are only a couple inches between the rim joist and concrete wall, making drywall affixed to a regular 2" x 4" frame impractical, as this would seriously narrow the passageway and prevent the egress of bulkier furniture. Therefore, we mount light gray faux wood board sheet paneling secured to half-inch strips of wood bolted directly to the concrete instead. It's a clean look and leaves us plenty of room. Later, we have Home Depot install lush, textured heavy duty gray stairway carpeting. Tim adds wood trim and shelving for a fine and understated finished touch.
Paint Selection
After the drywall passes inspection, we take quotes from painters, which turns out to be a dubious process; when we decide on an impressive sounding team that promises completion in two days, Belle cancels an appointment with another vendor and receives the following text: "I hope they spill paint on your floor!"
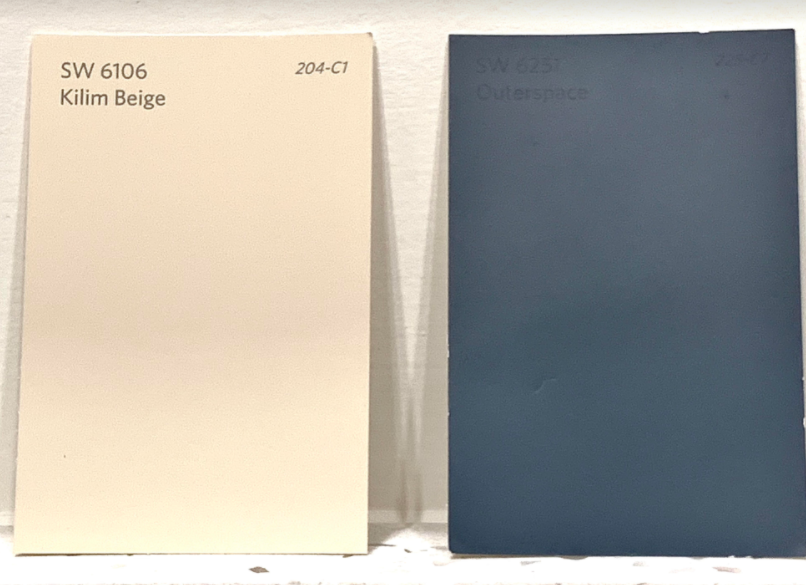
Our painters will be using premium Sherwin Williams paint, so having spent hours examining color brochures from other purveyors, we spend a couple more comparing paint chips from their company store before choosing our basement colors: Kilim Beige and Outer Space.
A Bloody Mess Turns Out Well
An obese Latin man in a stained T-shirt and jeans power sprays dry fall spray paint (the overspray turns to powder, falling to the ground harmlessly) on joists, floorboards and other overhead wooden surfaces, and latex paint primarily on ductwork and other metal surfaces. His smaller partners paint the walls, trim and other surfaces with primer and latex using brushes and pole mounted rollers.
Belle and I are horrified when we arrive home that evening and view large, jagged splotches of dark gray marring the moulding at wall-ceiling junctures, however, the proprietor assures us that this is the first coat and will be corrected on day two.
Thankfully, the second evening yields a more satisfactory outcome on first inspection but, unfortunately in the light of day, we find areas that need retouching or another coat of paint (including several hand prints that the large painter left in the stairwell while steadying himself on his descent).
We need that fixed, so with promises of a good review, Belle coaxes them back.
"Painters never got it perfect the first time," Tim assures later, "so when I do a job like this, I always schedule in an extra day or two for them to come back and touch things up."
Having pre-painted the baseboard strips before the flooring arrived, with Tim mounting them afterwards, the painters touch that up when they return to put their final touches on the walls, ceiling and stairways. At last it's looking very good, and Belle posts up their positive online review.
Simply Floored
We had originally planned to stain our concrete floor, but we soon realized that this would detract from the architectural detail and, with a cold cement slab underfoot, make for miserable winter months. We tentatively decided on having Mike and June's company install top of the line, commercial grade vinyl planking for an estimated $4500 to $5000 price tag.
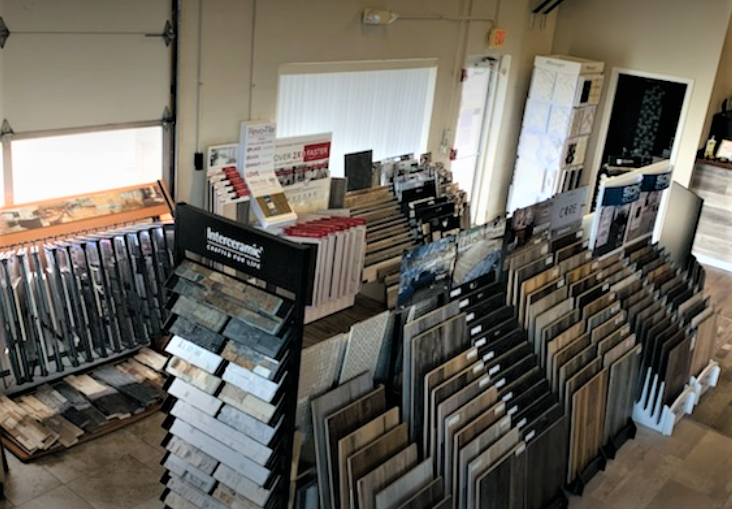
Photo courtesy of Epic Floors, Inc.
However, Mike is always busy and on the road, his flooring sample books are out with clients, and time is running out if we are going to be able to host our family for Christmas at Belle's dining table in our finished basement. So, exercising due diligence, Belle takes other estimates, ultimately visiting Epic Floors, Inc. in Wauconda, IL, to view floor samples with me.
Then, when Mike's final bid comes in hundreds of dollars higher than Epic's quote of $5200 for materials and installation of the Alexa Oak, we have to pass (this is business, after all).
Several days later, Epic's installers knock out the installation in a day and a half and—wow! Belle and I are extremely pleased with the texture and color of the grayish, light brown and tan planks. They complement the Outer Space ceiling and Kilim Beige walls and gives the basement an extra touch of refinement. But, we're not the only ones who think so; Ron and Tim are effusive with their complements.
"I'm really glad that you went with the flooring," Ron says, beaming when he's over re-mounting the 75" Vizio TV (I had put it up with a flimsy, $75 full motion, Best Buy recommended TV mount that frightened us when it abruptly tilted forward, so we had a pro install the heavy duty ECHOGEAR to be safe). "It looks great and really completes the look!"
Close Call
It's time to hang Belle's barn door, but with the crown moulding reducing available wall space above, the hanging hardware won't allow enough room for the door to clear. So, Belle and I return to Menards to swap the oversized barn door hardware rollers we'd purchased for smaller ones. It's still going to be awfully close, so Tim offers to shave off a small portion of the bottom of the door if need be. Belle and I whisper a small prayer and head upstairs to wait. Several hours later, the door's up and fits—barely! The brackets that house the wheels actually brush lightly against the moulding, while the door's bottom just grazes the floor in a spot or two. Whew! We're good.
When the village building inspector comes by for his final inspection, he is so impressed with Tim's work that he asks for his card. We are ready to rock!
Staging the Room
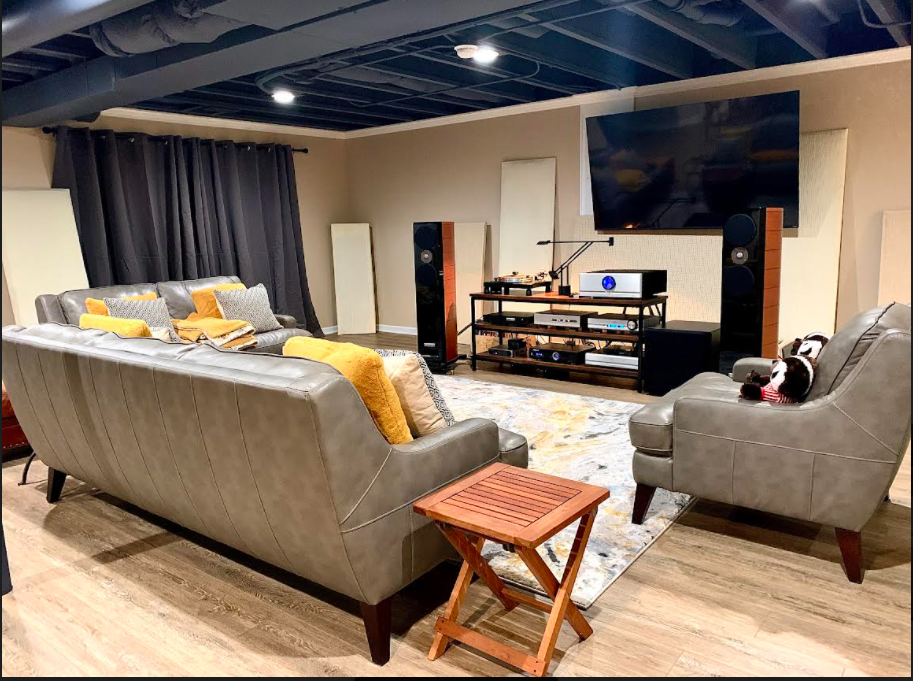
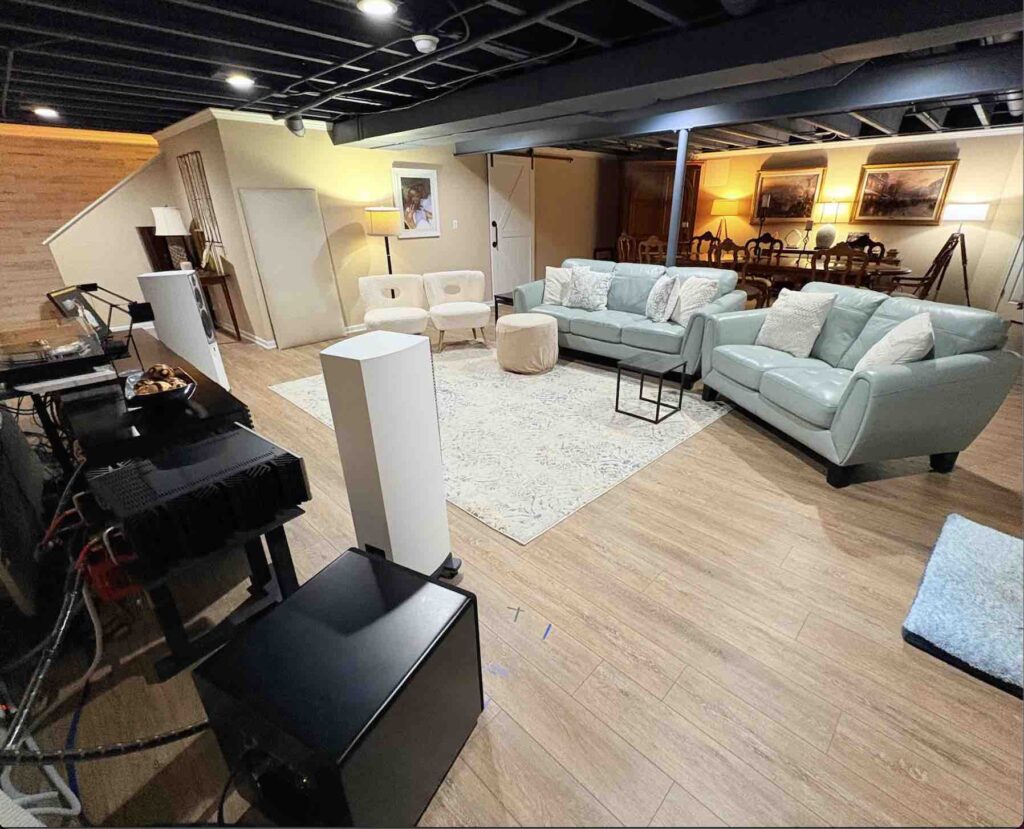
We move our furniture, electronics, and portable acoustic absorption panels and bass traps into place and are amazed.
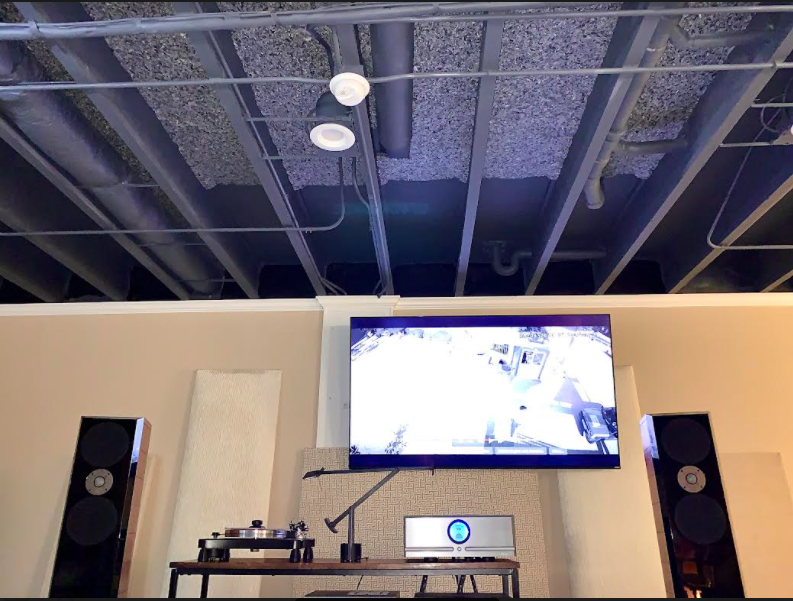
A 4' 3" H x 5' W acoustic absorption panel leans against the front wall under the TV, while two 2' W x 6' H acoustic panels flank the TV, a pair of 4' 2" H x 1' 10" stand several feet to each side further down. A 4' 2" bass trap resides at the left front corner, and two 5' 5" tall panels address the first reflection points along both side walls.
Another 5' 5" panel along with the a 4' 2" bass trap can be set up perpendicular to the front wall at the right side, creating a faux corner that's equidistant from the stereo as the left front corner. This creates a more focused center image, as the actual right wall corner is another nine feet at the stairwell landing, delaying reflections there by milli-seconds. Held in place with an old weightlifting stand, its position marked in tape on the floor, the faux corner is a bit ungainly and is only used for very critical listening.
The acoustic panels, which I built myself, can be easily moved and tucked away in the adjacent HVAC/storage room—which I do with three of them when we have family over, as Belle is sensitive to the opinions of others who don't share my enthusiasm for audio and its accoutrements.
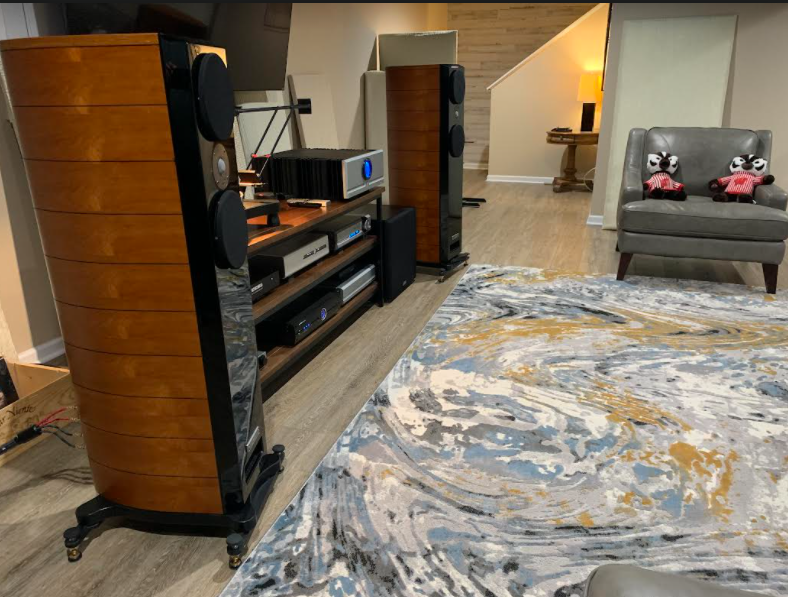
We unroll an eye-catching, thick 8' x 11' rug with an abstract, swirly light blue, gray, and gold pattern ($300 at Menards) resembling an underwater view of a crashing wave that dumped me on my head in Newport Beach, California in 1982. We carefully align it atop a thick carpet pad in front of the stereo with the listening couch, loveseat and overstuffed chair forming a semicircle around it. This rug should do a fine job of mitigating my speakers' first sound reflections on the floor.
Tim helps me lift the very heavy top half of Belle's entertainment armoire (we laughed at Belle's penchant for very heavy furniture as a petite person in her younger days; her china cabinet upstairs weighs 900 lbs. and the Thomasville couches she owned were massive), which I angle it at 45 degrees in the rear right corner of the room to mirror the rear left's short, angled corner wall (with a door to the sump pump) next to the nook for better symmetry and acoustics. The armoire houses treasures like autographed boxing gloves and pictures, a framed print of the Green Mill (a Chicago jazz bar where friends and acts like Patricia Barber perform), a gift guitar figurine from a friend, my Reza's waiter order book from the 90s and a large decorative Saugatuck Brewing Company jug from our honeymoon.
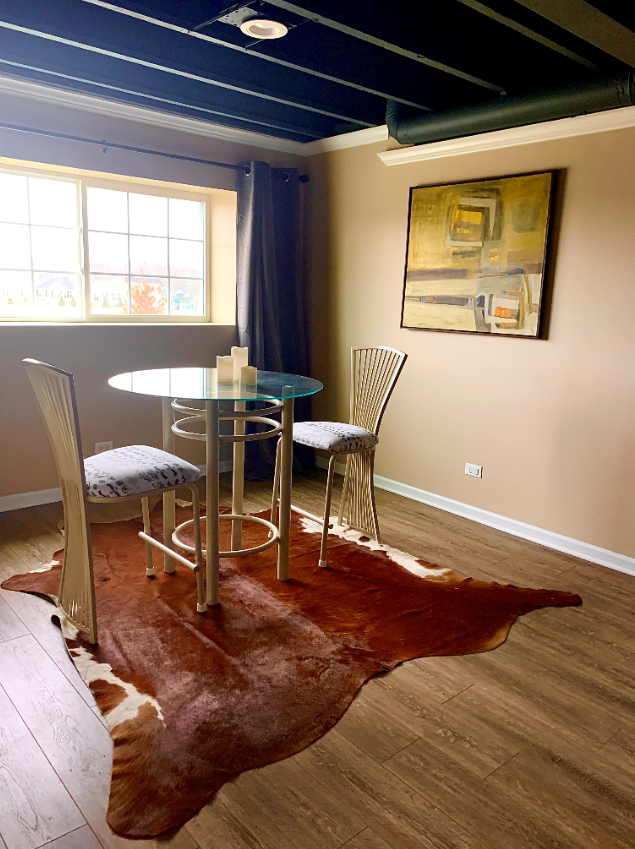
A painting by the late, Colorado Springs, CO based abstract painter, Al Wynne, hangs in our nook.
Belle's parents' tall, glass top table and two chairs that Belle reupholstered sit astride my cowhide rug in front of the nook's window.
Curtains
We repeatedly order drapery, but they never seem quite right—until the last try. A first pair is thick but doesn't pleat, looking like oversized beige pants ironed along their seams. The next set has a nice texture but seems a tad thin for blocking and acoustic duties, and are too light in value, appearing to blend in with the walls. Finally, we order four gray, single panels of 100" W x 84" L NICETOWN Total Shade Patio Door curtains ($34.95 each) from Amazon that not only block light and tame acoustics well, but they have a luxurious, thick and velvety quality. I anchor them to studs (save one bolt that goes into an expanding wall anchor, as there's not an available stud for that one) roughly six inches above the garden windows. The curtains drape lightly on the floors.
Details, Details
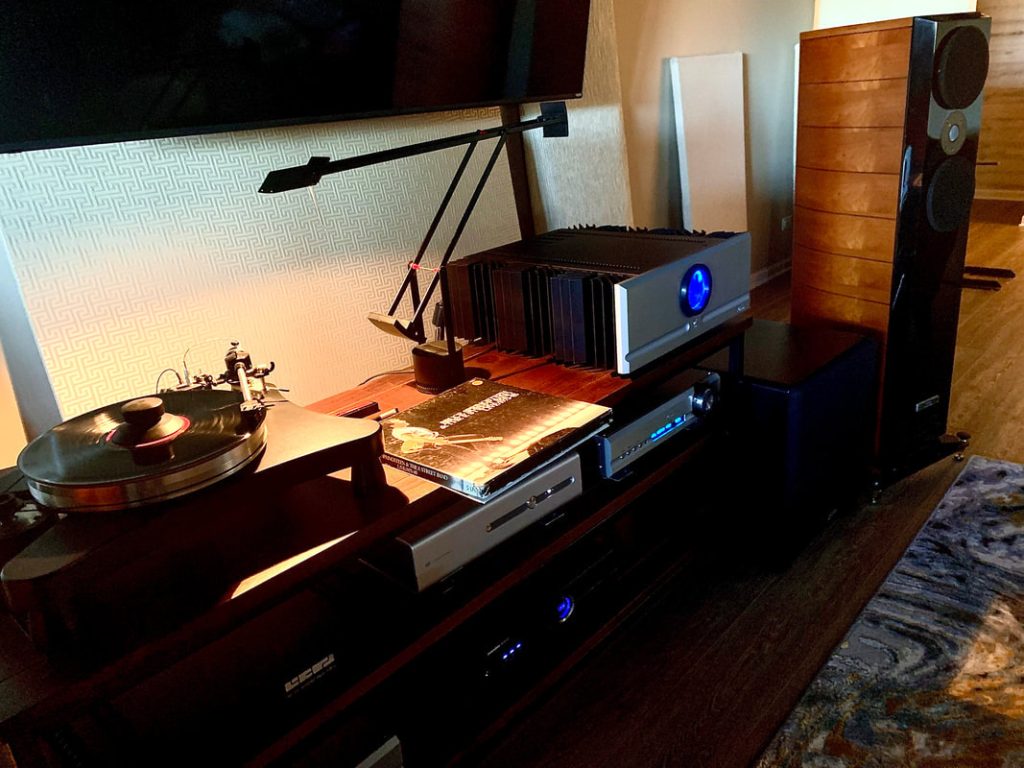
Belle buys a pair of oversized, shimmery metal leaf wall decorations that I mount by the stairs' landing, and a marine tripod floor lamp (my Christmas gift) that sits to the left of the leather loveseat in the AV area. In turn, I purchase a Tizio lamp that sits between the Pass Labs X150.8 amp and VPI Prime Scout turntable that it spotlights atop the Simpli Home Skyler TV Stand (the lamp plugs into a circuit separate from the A/V ones, eliminating any potential hum issues).
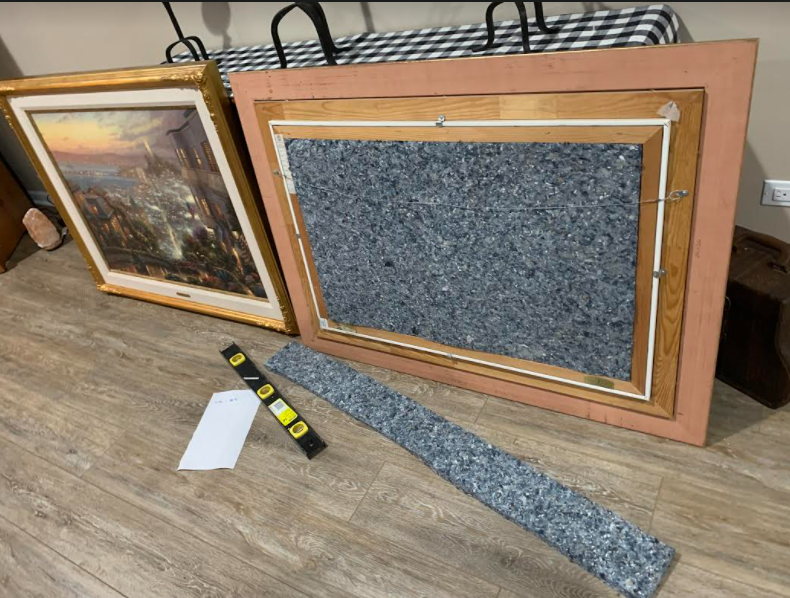
I employ some ASI CAP Cellulose Insulation acoustic panels for an acoustic cloud over the AV space upfront—mounting them on the 1" x 1" wood strips running along the floor joists overhead (this creates a one inch air gap between insulation and ceiling for better absorption at this first reflection point)—and on the backs of three Thomas Kinkade painting replicas (two at the rear wall and one in the nook).
Another painting by the late abstract painter (and my uncle), Al Wynne. hangs on the opposite wall of the nook.
For extra bass management at the wall-ceiling juncture up front, I use leftover Thermafiber Fire & Sound Guard insulation that Tim had placed atop framing around the room to meet code (that's to retard to the potential fire spreading from the basement to the main level), stuffing the recessed area partially filled with spray painted insulation just above and behind the crown moulding with several thicknesses. I cover and secure it with black fabric ground cover that's sonically transparent.
Tweaking Speaker Placement
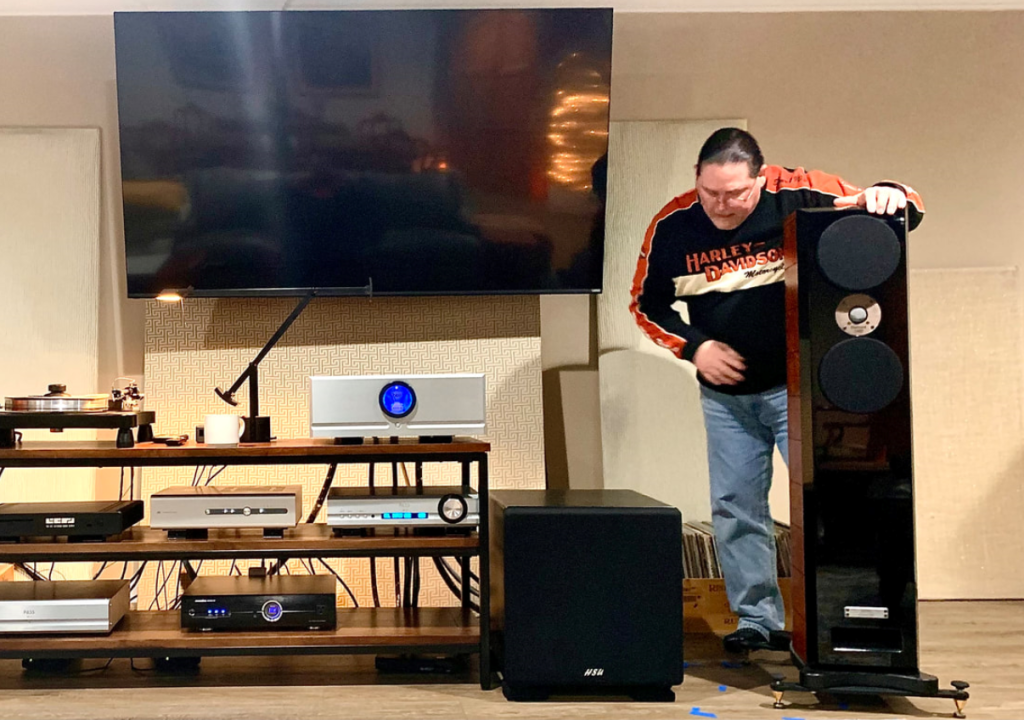
Then, towards the end of February, my friend, Joe Jurzek, 64, an IT consultant and audio professional comes over and fine tunes the placement of my Usher Audio Mini Dancer 2 DMD speakers, and he likes them so much, he buys them from me several days later! Joe is a very direct, divorced, and hard-working individual with an imposing presence who wears a pony tail and runs a men's Bible study that I attend on Saturday mornings at 7:30 AM. Like me, he's a bigger guy, runs a sound board at church, and loves a good laugh.
When I designed the final layout, I was concerned about the room coloring the aural presentation, so in addition to employing thick curtains, room and ceiling acoustic treatments, I placed the seating in the front half of the room, with the face of my speakers five feet forward of the front wall and about 11 feet from the center position of the listening couch, with severe toe-in, aiming them at the ears of a person seated there. Moreover, I placed them fairly close to each other—maybe seven feet apart—to help ensure a very solid center image. However, I noticed that as the signal approached 90 dB, the sound of my User Mini Dancer 2 DMD speakers took on a harder edge than I liked.
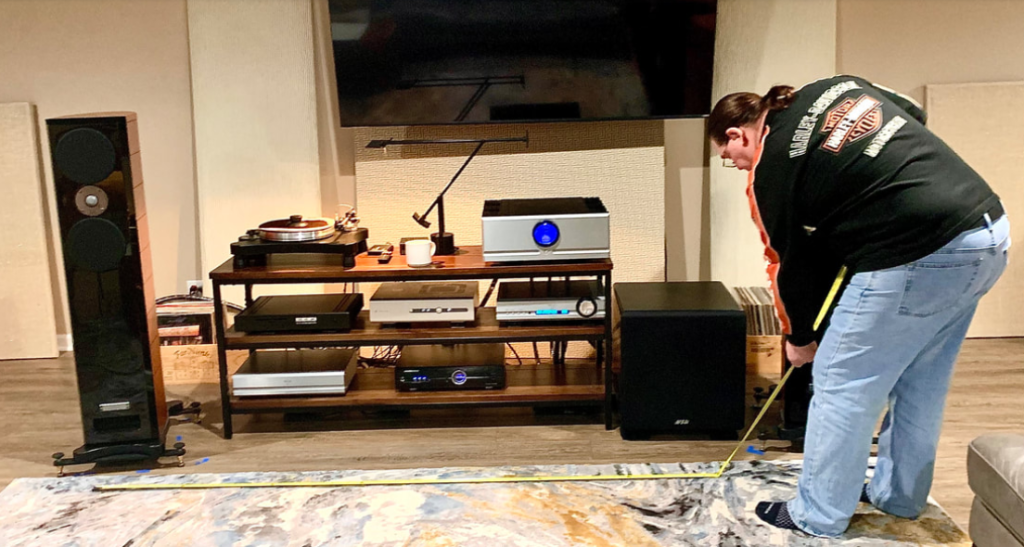
Joe is impressed with the Mini Dancer 2s, but suggests a few tweaks to reduce the hardness and improve the soundstage. Borrowing a measuring tape, he moves the right speaker roughly seven inches to the right.
I explain that I keep them closer together as I don't want the strength of the center image to collapse.
"Nonsense," he says.
Next, he suggests toeing them wider, reasoning that since these Usher Mini Dancer 2 DMDs employ a diamond tweeter, it's very detailed and can produce a harder sound. Comparing a silk tweeter with a rubber mallet and the DMD tweeter to a sledgehammer, he said that the former softens the sound of impact whereas the latter produces a sharper one, therefore "you don't want the diamond tweeter pointed directly at your ears."
I suggest that toeing the speakers out more might increase the room effect, however, he assures me that the room's size, the system's distance from the far wall and the sitting nook area mitigates any negative effects.
"Besides, I don't hear your room at all when I'm listening," he notes, adding that other factors, such as the exposed beams in the ceiling breaking up the flat reflective surface, the ducts above, curtains, acoustic treatments, furniture upfront, and the large dining table at the rear of the room all help diffuse and/or absorb sound reflections very well.
Ushering in a New House Speaker
Now, Joe already owns a pair of Klipsch Cornwall 3 speakers that, he says, provides a live sound very similar to what we'd hear when we operate a sound board for live music. However, when playing an EP by Emily Kathryn that he personally observed during its production at a nearby recording studio, "the presentation sounded exactly the same," he claims, as he'd heard on the studio's monitors. He is very impressed with the Mini Dancers' level of detail, as well as the weightiness of the bass that their tall, deep cabinets yield—so much so, he buys them from me! Bottom line, he wants a pair of speakers that reveal everything when he's mixing music recordings.
I concur and, having previously reviewed the Usher Audio SD-500 monitors ($1995) and TD-10s, a $22,000 model that employs a diamond tweeter and midrange, I am aware of a certain, accurate house sound that's characteristic of the brand. And as a reviewer, I want speakers that will not only deliver a balanced, nuanced, and detailed presentation, but one that will reveal the differences in equipment introduced into the system, as opposed to a "live" sound that makes just about everything in the chain sound pretty good.
Hence, I am currently waiting on the Mini Dancer 2s replacement—a new pair of Usher ML-802 speakers ($14,300), with their magnesium alloy tweeter and midrange driver, and two eight inch hybrid carbon fiber woofers. As my new reference speakers, they are shipping via container ship from Taiwan and should be arriving in the next two months.
Waiting Game
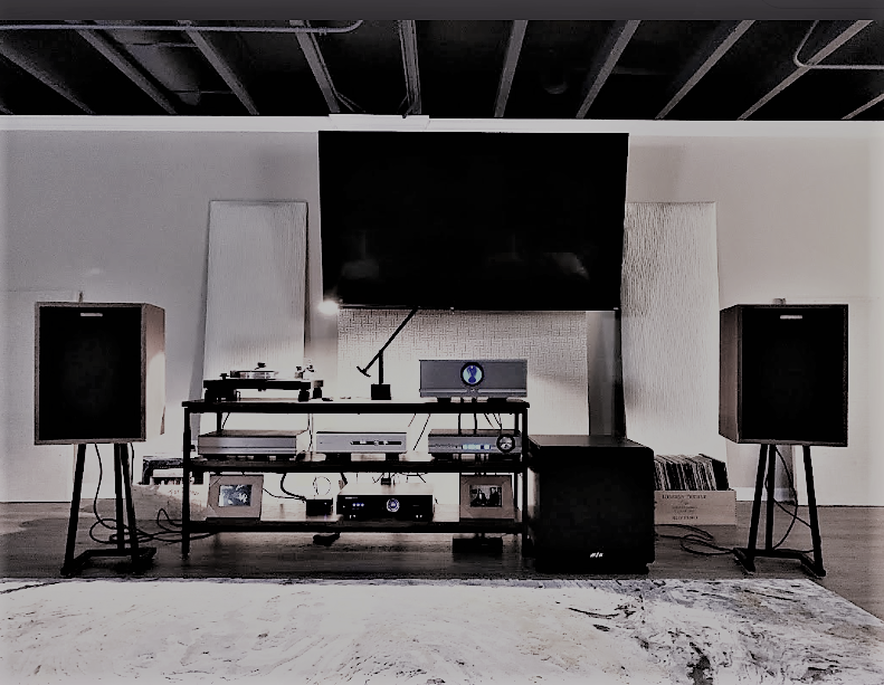
In the meanwhile, I am listening to a borrowed pair of vintage Klipsch Heresies, which were originally purchased in the 1970s but sound surprisingly good with the Pass Labs amplification, Schiit Audio Yggdrasil OG DAC, Straight Wire reference cabling, and my Hsu Research subwoofer.
Belle and I are really looking forward to the arrival of the ML-802s—although perhaps for different reasons. I am especially curious to hear how they sound, especially after they break in after the first 150 hours of playback time. Belle, on the other hand, doesn't care for the boxy look of the Heresies, preferring a more sleek and clean look. Actually, I do, too! They match up well with high end components; they have been featured in a handful of Uber expensive Triangle Art turntable and amplification equipment videos and demos.
It's a Wrap
I still need to tie up some loose ends. For example, I plan on repairing my old Barcelona Chair replica and placing it in the stair landing area (its straps are broken, courtesy of a family member kneeling on it several years ago), and we've got some serious purging we need to do in our storage room this summer. However, we are pretty much finished with our basement.
Celebration in Order
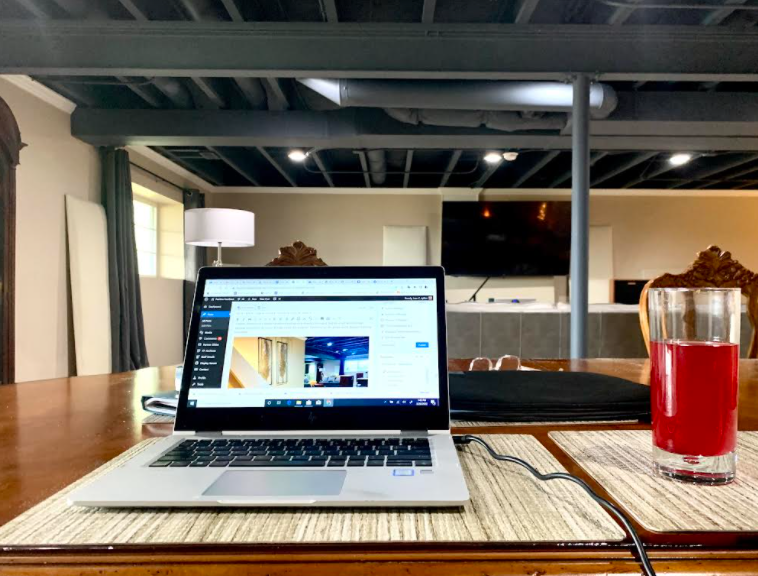
It took about three and a half months, but the results have been very gratifying. Some $25,000 later, we finished in time to host the family Christmas dinner at Belle's dining table. Now, Belle has a lovely view of her garden windows from the stairs' landing, and I have the best sounding listening and AV room I've ever had. We dine, watch movies, listen to music, and dance in this delightful space. And I use the dining room table as a desk as well, giving me plenty of space to spread out materials and work. For me as a writer and teacher, that's a big win!
Nowadays, everyone's busy, but Belle and I are definitely planning on having Mike and June (whose business keeps them extremely busy), Tim and Ron—and their wives—over in a few months when the weather thaws and our schedules mesh to celebrate the completion of our project, as well as the arrival of out new reference speakers. This truly has been a communal effort. And it's been a long time coming.


